Blog

  • How to Set Up a Field Hide for Wildlife Watching and Photography

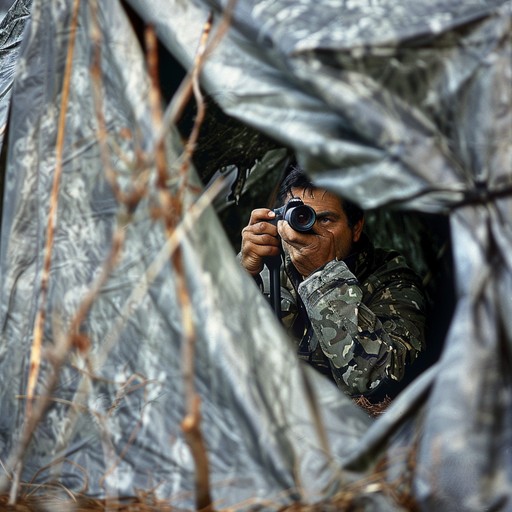
    The best wildlife encounters happen when the animal has no idea you are there. A field hide — whether a purpose-built blind or a simple natural structure — removes you from the visible landscape and lets you observe behavior that would never occur with a human standing in plain sight.

    It does not need to be elaborate. Some of the most productive hides are nothing more than a carefully chosen spot, a camo net, and enough patience to let the landscape settle around you. Here is how to do it right.


    Why a Hide Works

    Animals respond to three things that give humans away — movement, scent, and shape. A hide addresses all three simultaneously. It breaks your outline, limits your movement, and when positioned correctly relative to wind direction, keeps your scent away from your subject.

    The result is access to natural behavior — feeding, social interaction, territorial displays, parenting — that disappears the moment an animal knows it is being watched. For wildlife photographers especially, a hide is not optional equipment. It is the difference between a distant record shot and an image that tells a real story.


    Types of Hides

    Natural Hides

    The simplest and most effective hides use existing landscape features — a fallen log, a dense shrub, a rocky outcrop, a fold in the ground. Natural hides require no equipment, leave no trace, and blend perfectly because they are part of the environment.

    Before investing in any equipment, spend time identifying natural features at your watching site that offer concealment, a clear line of sight, and a favorable wind position. A hollow in a streambank with a view across a water source is worth more than any manufactured blind.

    Portable Pop-Up Blinds

    Pop-up blinds are the most practical option for most wildlife watchers and photographers. They set up in minutes, pack down to a manageable size, and provide full concealment with pre-cut viewing windows for optics and cameras.

    [Recommended: Portable Pop-Up Wildlife Blind]

    Look for:

    • Camo pattern matched to your environment — woodland patterns for forested sites, prairie or marsh patterns for open country
    • Shoot-through mesh windows — allow you to photograph through the blind without opening a flap and creating movement
    • Hub-style frame — faster and easier to set up than pole-and-sleeve designs
    • Scent-control fabric — reduces odor transmission, worth having for mammal watching

    Pros:

    • Fast setup and breakdown
    • Full concealment from all angles
    • Protects you and your gear from weather
    • Comfortable for extended sessions

    Cons:

    • Takes up pack space
    • Needs to be set up in advance for best results
    • Can look unnatural if not positioned carefully

    Camo Nets and Burlap

    A lightweight camo net draped over natural vegetation or a simple frame is more versatile than a pop-up blind and packs down to almost nothing. It is the preferred option for photographers who need to move between sites or work in terrain where a freestanding blind looks out of place.

    [Recommended: Lightweight Camouflage Net]

    A 5×10 foot net weighs under a pound and can be shaped around almost any natural feature. Attach it to branches, trekking poles, or a simple wire frame depending on the site.

    Ground Blinds and Layout Blinds

    For watching birds and low-profile mammals at ground level — geese, cranes, shorebirds, prairie dogs — a layout blind lets you lie flat and become effectively invisible in open terrain. These are primarily used by waterfowl hunters but work equally well for wildlife photography in grassland and wetland habitats.

    [Recommended: Layout Ground Blind]

    Vehicle Hides

    Your car or truck is one of the most effective wildlife hides available. Animals in areas with vehicle traffic quickly become habituated to parked vehicles while remaining wary of humans on foot. Sitting quietly in a parked vehicle at a wildlife area, refuge, or roadside pullout with a window mount for your optics or camera gives you a stable, concealed platform that most animals ignore entirely.

    [Recommended: Car Window Mount for Binoculars or Camera]

    For serious vehicle-based wildlife photography, a beanbag rest or dedicated window mount stabilizes long lenses far better than handholding.

    [Recommended: Beanbag Camera Rest for Vehicle Use]


    Choosing the Right Location

    The location of your hide matters more than the hide itself. A perfectly constructed blind in the wrong spot produces nothing. A rough natural hide in the right spot produces everything.

    Find the Activity First

    Before setting up anything, spend time observing the site without a hide. Where are animals moving? What time do they arrive? Which direction do they approach from? What are they doing — feeding, drinking, resting, displaying?

    This observation phase is not wasted time. It is the most valuable time you will spend at any site, and it prevents you from setting up in completely the wrong position.

    Work Around Wind

    Position your hide so the prevailing wind blows from the area you expect animals to approach toward you — not from you toward them. At most sites this means setting up downwind of the focal point — a water source, a feeding area, a trail crossing.

    Check wind direction at the specific time of day you plan to watch. Morning thermals in mountain terrain often flow downhill; afternoon thermals flow uphill as the ground warms. Wind direction at 6am may be completely different from wind direction at 2pm.

    Prioritize Line of Sight

    You need a clear, unobstructed view of your focal point from a comfortable sitting or lying position. Check this before committing to a site — what looks like a clear view standing up can be completely blocked by grass or low vegetation at seated height.

    Consider the light direction too. For photography especially, having the sun behind you and illuminating your subject produces far better images than shooting into the light. Position your hide on the west or north side of your focal point for morning sessions, east or south for afternoon.

    Set Up in Advance

    Animals notice changes in their environment. A hide that appears overnight gives wildlife time to assess and accept it before you are inside it. Where possible set up your hide one to three days before you plan to use it — even a pop-up blind becomes part of the landscape quickly once animals have investigated and found it harmless.

    If same-day setup is necessary, arrive well before expected activity and give the site at least 30 minutes to settle after setup before expecting results.


    Setting Up a Pop-Up Blind

    Step by Step

    1. Choose your position — downwind of the focal point, clear line of sight, good light angle
    2. Clear the ground — remove any sticks, dry leaves, or debris that will make noise when you shift position
    3. Set up the blind — most hub-style blinds open in seconds; stake it down firmly so wind does not move it
    4. Add natural cover — attach local vegetation — branches, grass, reeds — to the exterior of the blind using the loops or straps provided. This breaks the geometric outline of the blind and helps it blend with the surroundings. Use vegetation from the immediate area rather than cutting material from elsewhere
    5. Set your windows — open only the windows you need; closed windows reduce light leakage from inside the blind that can alert animals
    6. Check your shooting lane — sit down inside and confirm your view is clear from your actual working position, not from standing height
    7. Back out carefully — leave the site without walking through the area animals will be approaching from

    Inside the Blind

    • Wear dark clothing — animals can see inside a blind through mesh windows, particularly in low light. Dark colors reduce your visibility inside the blind significantly
    • Minimize movement — slow, deliberate movements only; no sudden gestures
    • Keep gear organized — know where everything is so you are not searching noisily for a lens cap or snack at a critical moment
    • Silence your phone — completely, not just on vibrate
    • Be patient — plan to be in position for at least two to three hours; the best activity often comes after a long quiet period

    Scent Control

    For mammal watching especially, scent is the variable that defeats everything else. A perfectly positioned, perfectly constructed hide that puts your scent into the approach path of a whitetail or elk is a wasted morning.

    Practical scent management for hide use:

    • Approach from downwind every single time — not most times, every time
    • Wash clothing in scent-free detergent before sessions — standard laundry detergent leaves UV-brightening residue that is also visible to many animals
    • Store clothing in a sealed bag with natural material — dry leaves, pine needles, or soil from the site helps neutralize foreign odors
    • Avoid scented products on the day — no cologne, scented deodorant, or strongly scented food
    • Use a wind checker regularly — wind shifts happen; check it every 20 to 30 minutes during a session

    [Recommended: Scent-Free Laundry Detergent for Hunting and Wildlife Use] [Recommended: Wind Checker Powder]


    Hides for Specific Situations

    Water Sources

    A hide overlooking a reliable water source is the most consistently productive setup in dry conditions. Almost every species in the area will visit eventually. Set up on the downwind side, position for morning or evening light, and plan for a long session — activity can be unpredictable but is almost guaranteed at some point.

    Keep the hide well back from the water’s edge — 30 to 50 feet minimum. Animals approaching water are already alert and cautious; a hide too close to the source will be detected and avoided.

    Woodland Edges and Clearings

    Position the hide at the edge of cover looking into the open area rather than in the middle of the clearing. Animals emerging from cover will appear at the treeline — often pausing to assess before moving into the open — which gives you time to prepare and produces naturally framed images.

    Bird Feeding Areas

    A hide near a feeding station — whether natural berry bushes, a seeded area, or a supplemental feeder — produces fast, predictable activity and is the best setup for beginning wildlife watchers. Birds habituate to a hide very quickly, often within minutes, making it an excellent environment to practice hide technique before applying it to more challenging situations.

    Nest Sites and Dens

    Extreme caution is required around nest sites and active dens. The welfare of the animal always takes priority over any photograph or observation opportunity. General principles:

    • Never set up a hide at a nest or den without prior knowledge that the species tolerates it — many do not
    • Approach and setup should cause zero disruption to normal behavior
    • If the animal shows any stress response to your presence, back off immediately and do not return until the breeding season is over
    • Check local regulations — some species and nest sites are legally protected and disturbance carries significant penalties

    Essential Hide Kit

    Beyond the hide itself, a few items make extended sessions significantly more comfortable and productive:

    Seating — a low, lightweight camp stool or foam sit pad keeps you comfortable for hours without the fidgeting that comes from sitting on hard ground.

    [Recommended: Lightweight Folding Camp Stool]

    Knee and elbow pads — for ground-level work in a layout blind or natural hide, basic foam pads make long sessions on hard or wet ground manageable.

    Gloves and face cover — hands and faces are the most visible parts of a person inside a blind. Dark or camo gloves and a simple face mask or buff eliminate two of the most common sources of animal alarm from inside a hide.

    [Recommended: Camo Face Mask and Gloves Set]

    A thermos — long sessions in the field go better with a hot drink. A quality vacuum thermos keeps coffee or tea hot for six to eight hours.

    [Recommended: Vacuum Insulated Thermos]

    Knee-high rubber boots or waterproof footwear — hide sites near water are often wet underfoot. Wet feet end sessions early.

    [Recommended: Waterproof Rubber Boots for Field Use]


    Frequently Asked Questions

    How long should I stay in a hide?

    Plan for a minimum of two to three hours per session. Wildlife activity is unpredictable and the best moments often come after a long quiet period. The first 30 to 45 minutes after setup or arrival is typically the quietest — animals in the immediate area need time to settle and resume normal behavior. Sessions of four to six hours produce the best results at most sites.

    Do I need a purpose-built blind or will natural cover work?

    Natural cover works extremely well when used thoughtfully. The advantage of a purpose-built blind is consistency — it gives you the same concealment in any location regardless of available natural cover, and protects you and your gear from weather. For photographers with expensive equipment, the weather protection alone justifies carrying a blind. For casual observers, a camo net over natural vegetation is often all you need.

    How close can I get to wildlife in a hide?

    Closer than you can on foot — but the right distance still depends on the species, season, and individual animal. Watch for stress signals even from inside a hide. A hide reduces your visual and scent signature but does not make you invisible — some individuals will still detect and avoid a hide regardless of how well it is positioned. The right distance is always the one at which the animal shows no awareness of your presence.

    Can I use a hide for wildlife photography with a long lens?

    Yes — and a hide significantly improves wildlife photography by allowing much closer approach distances and natural behavior. Most pop-up blinds have shoot-through mesh windows designed for camera lenses. For telephoto work a window mount or beanbag rest inside the blind stabilizes the lens far better than handholding over an extended session.

    How do I stop condensation fogging my lens inside a blind?

    Temperature difference between inside and outside the blind causes condensation on cold glass. Allow your camera and lenses to acclimatize to outdoor temperature before entering the blind — bringing warm gear from a heated car directly into a cold blind is the main cause. Inside the blind, keep lens caps on until you are ready to shoot and avoid breathing directly toward the front element.


    Always follow local regulations regarding wildlife disturbance and protected species before setting up hides near nest sites or dens.

  • Best Camp Stoves for Backcountry Cooking

    A hot meal at the end of a long day in the backcountry is not a luxury — it is a morale essential. Whether you are boiling water for a freeze-dried dinner at 11,000 feet or cooking a real breakfast at a base camp, the right stove makes it fast, reliable, and simple.

    The market splits into a few clear categories: ultralight canister stoves for fast and simple cooking, alcohol stoves for minimalist gram-counters, and liquid fuel stoves for cold weather and extended expeditions. Here is what is worth carrying.


    Quick Answer

    • Best overall: MSR PocketRocket 2 — ultralight, fast, reliable, works in most conditions (~$45)
    • Best for fast boiling: Jetboil Flash — integrated system, boils water in 100 seconds, extremely efficient (~$110)
    • Best for real cooking: MSR WindBurner Duo — stable, wind-resistant, fits a proper cook pot (~$230)
    • Best budget pick: Gas One Backpacking Stove — simple, lightweight, affordable (~$10)
    • Best for cold weather and expeditions: MSR WhisperLite Universal — liquid fuel, works in extreme cold, field repairable (~$200)
    • Best ultralight option: Soto Windmaster — 67g, exceptional wind resistance for its size (~$70)

    Our Picks

    1. MSR PocketRocket 2 — Best Overall

    Price: ~$45 | Weight: 2.6 oz | Boil time: 3.5 min per liter | Fuel: Isobutane canister

    The PocketRocket 2 is the stove most backcountry hikers should buy. It weighs less than three ounces, screws onto any standard isobutane canister, and boils water reliably in most three-season conditions. The fold-out pot supports are stable enough for a standard cook pot, and the simmer control is better than most stoves in this price range.

    It is not perfect in wind — no canister stove is — but for protected cooking spots and three-season Rocky Mountain use it handles everything you will throw at it.

    Pros:

    • Ultralight at 2.6 oz
    • Affordable for the quality and reliability
    • Screws onto any standard isobutane canister
    • Good simmer control for a stove at this price
    • Compact — fits inside a standard cook pot for packing

    Cons:

    • Wind performance is average — needs a windscreen or sheltered spot
    • Not ideal below freezing — canister pressure drops in cold temperatures
    • No integrated pot — you need to bring your own cookware
    • Pot supports are small — unstable with larger pots

    2. Jetboil Flash — Best for Fast Boiling

    Price: ~$120 | Weight: 13.1 oz with cup | Boil time: 100 seconds per liter | Fuel: Isobutane canister

    If your backcountry cooking consists mostly of boiling water for coffee, oatmeal, and freeze-dried meals, the Jetboil Flash is hard to beat. The integrated burner and insulated cup system is extraordinarily efficient — a liter of water boils in 100 seconds using less fuel than almost any other stove. The push-button igniter, color-changing heat indicator, and self-contained system make it the fastest and most convenient option available.

    The trade-off is that the integrated system is designed for boiling, not real cooking. Simmering and frying are possible but awkward.

    Pros:

    • 100-second boil time is the fastest in this guide
    • Extremely fuel-efficient — makes canisters last significantly longer
    • Integrated insulated cup keeps food warm while eating
    • Push-button igniter — no lighter needed
    • Everything nests together into a compact, self-contained unit

    Cons:

    • Heavier than a simple canister stove at 13.1 oz with cup
    • Designed for boiling — poor simmering control for real cooking
    • Proprietary cup system — less versatile than a standard stove
    • More expensive than comparable boiling-only options

    3. MSR WindBurner Duo — Best for Real Cooking

    Price: ~$230 | Weight: 15.8 oz with pot | Boil time: 4.5 min per liter | Fuel: Isobutane canister

    The WindBurner Duo is built around a radiant burner design that performs exceptionally well in wind — the main weakness of standard canister stoves. The 1.8-liter pot fits two people comfortably for real meals rather than just rehydrated food, and the stable base handles a loaded pot without the wobble that plagues smaller stoves. For two-person trips where you want to cook actual food rather than just add boiling water to a bag, it is the best integrated system available.

    Pros:

    • Radiant burner design resists wind far better than standard canister stoves
    • 1.8-liter pot comfortably feeds two people
    • Stable base handles heavy pots securely
    • Good simmer control for a canister stove
    • Everything nests together neatly

    Cons:

    • Heaviest option in this guide at 15.8 oz
    • Most expensive canister stove here
    • Boil time is slower than the Jetboil Flash
    • Proprietary pot system limits cookware flexibility

    4. Gas One Backpacking Stove — Best Budget Pick

    Price: ~$15 | Weight: 3 oz | Boil time: ~4 min per liter | Fuel: Isobutane canister

    If you want a functional canister stove without spending serious money, the Gas One delivers. It is light, simple, and works reliably in three-season conditions. Build quality reflects the price — it is not as refined as MSR or Jetboil — but for occasional use or as a backup stove it does everything a backcountry stove needs to do.

    Pros:

    • Extremely affordable
    • Lightweight at 3 oz
    • Works with standard isobutane canisters
    • Simple and reliable for three-season use

    Cons:

    • Build quality is noticeably below premium options
    • Poor wind performance
    • Less precise simmer control
    • Not suitable for serious cold-weather use

    5. MSR WhisperLite Universal — Best for Cold Weather and Expeditions

    Price: ~$200 | Weight: 11.2 oz | Boil time: 3.5 min per liter | Fuel: Liquid fuel or isobutane canister

    Canister stoves lose pressure and performance in cold temperatures — below about 20°F they become unreliable. Liquid fuel stoves like the WhisperLite Universal do not have this problem. They burn white gas, kerosene, and unleaded gasoline — fuels that perform consistently in extreme cold and are available worldwide. The WhisperLite can also be field-repaired with a basic tool kit, which matters on extended expeditions far from a gear shop.

    For three-season Rocky Mountain hiking, a canister stove is simpler and sufficient. For winter camping, high-altitude mountaineering, or international travel, the WhisperLite is the right tool.

    Pros:

    • Performs reliably in extreme cold where canister stoves fail
    • Burns multiple fuel types including white gas and unleaded gasoline
    • Field repairable with included maintenance kit
    • Proven reliability over decades of expedition use
    • Works at altitude where canister pressure drops

    Cons:

    • Heavier and more complex than canister stoves
    • Requires priming before use — slower to get going than canister stoves
    • Liquid fuel requires a separate fuel bottle
    • Overkill for three-season hiking at moderate elevations

    6. Soto Windmaster — Best Ultralight

    Price: ~$60 | Weight: 2.3 oz | Boil time: 2.5 min per liter | Fuel: Isobutane canister

    The Windmaster is the best ultralight canister stove available for Rocky Mountain conditions. At 2.3 oz it is lighter than the PocketRocket 2, and its micro-regulator technology maintains consistent output as the canister empties and temperatures drop — a significant practical advantage over standard canister stoves. Wind performance is genuinely impressive for a stove this size.

    For gram-conscious backpackers who do not want to sacrifice reliability for weight, it is the best single-burner canister stove available.

    Pros:

    • Lightest stove in this guide at 2.3 oz
    • Micro-regulator maintains consistent output in cold and as canister empties
    • Excellent wind resistance for its size
    • Fast boil time of 2.5 minutes per liter
    • Compact and packable

    Cons:

    • More expensive than the PocketRocket 2 for similar functionality
    • Four-flex pot support sold separately — standard pot support is small
    • Less widely available than MSR and Jetboil options

    What to Look for When Choosing a Camp Stove

    Fuel Type

    Isobutane canisters — the standard for most backcountry use. Clean burning, easy to use, widely available at outdoor retailers. Performance drops in cold temperatures and as the canister empties. Not available everywhere internationally.

    Liquid fuel (white gas) — performs in extreme cold and at altitude, available worldwide, more economical on long trips. Requires more setup and maintenance than canister stoves.

    Alcohol — ultralight and simple, virtually no moving parts to fail. Slow boil times, poor performance in wind and cold, and no flame control. Best for ultralight minimalists on warm-weather trips.

    Solid fuel tablets — emergency use only. Slow, smelly, and leaves residue. Worth carrying as a backup but not a primary cooking method.

    Weight

    For backpacking, stove weight matters. A simple canister stove like the PocketRocket 2 or Soto Windmaster weighs under 3 oz. An integrated system like the Jetboil adds the weight of the cup but saves overall system weight through fuel efficiency. Factor in the weight of your cook pot, fuel canister, and lighter when comparing systems.

    Wind Performance

    Wind is the biggest variable in backcountry cooking performance. Standard canister stoves lose significant output in even moderate wind. Solutions include:

    • Choosing a stove with better wind resistance (Soto Windmaster, MSR WindBurner)
    • Using a windscreen — a simple foil windscreen costs nothing and makes a significant difference
    • Positioning your stove in a sheltered spot — behind a rock, a pack, or a natural wind break

    Never use a windscreen with an integrated canister stove like the Jetboil — heat buildup around the canister is a safety risk.

    Boil Time and Fuel Efficiency

    Boil time matters most when you are cold, hungry, and tired. The Jetboil Flash wins on raw speed. For fuel efficiency over a long trip, integrated systems like the Jetboil and WindBurner use significantly less fuel per boil than open burner stoves — which means carrying fewer or smaller canisters.

    Cooking vs. Boiling

    If your backcountry meals are freeze-dried or instant — just add boiling water — any stove works. If you want to actually cook — simmer sauces, fry eggs, make real meals — you need a stove with good simmer control and a stable platform for a proper pot. The WindBurner Duo and WhisperLite are the best options here.


    Stoves by Use Case

    Solo Backpacker — Freeze-Dried Meals and Coffee

    Fast, light, and simple. Boiling water is all you need.

    Two-Person Trip — Real Cooking

    Stability, wind resistance, and a proper pot size matter more than weight.

    Winter Camping or High-Altitude Mountaineering

    Canister stoves lose reliability below 20°F. Liquid fuel is the right call.

    Car Camping or Base Camp

    Weight is not a concern. A larger two-burner propane stove gives you a full cooking experience.

    [Recommended: Camp Chef Two-Burner Propane Stove]


    Don’t Forget

    A lighter or matches — even stoves with built-in igniters can fail. Always carry a backup lighter.

    MK Candle Lighter – refillable butane

    Waterproof Matches

    A pot — most stoves do not include cookware. A 0.9-liter titanium pot handles solo cooking; a 1.5 to 2-liter pot suits two people.

    Fuel — isobutane canisters are available at REI, outdoor retailers, and many sporting goods stores. Do not count on finding them at a gas station. Buy before you go.

    A windscreen — a simple folded foil windscreen weighs almost nothing and significantly improves performance in wind for open burner stoves.

    [Recommended: MSR Heat Reflector]


    Frequently Asked Questions

    How much fuel do I need?

    A rough guide for isobutane canisters: a 100g canister provides roughly 45 minutes of burn time for a standard canister stove — enough for 8 to 10 boils. For a solo weekend trip of two to three days, one 100g canister is usually sufficient. For a week-long trip or two people, carry two. Integrated systems like the Jetboil use significantly less fuel per boil — one 100g canister can last a solo hiker up to five days.

    Can I use any canister with my stove?

    Most canister stoves use a standard Lindal valve fitting and are compatible with canisters from MSR, Jetboil, Snow Peak, Primus, and other major brands. Always verify compatibility before your trip — a mismatched canister and stove is a frustrating problem to have at the trailhead.

    Are canister stoves allowed in fire-restricted areas?

    In most cases yes — canister stoves are generally permitted even when campfires are prohibited. Always check current regulations for your specific area before your trip as rules vary by land management agency and fire conditions.

    How do I dispose of empty fuel canisters?

    Puncture empty canisters before recycling — most outdoor retailers sell inexpensive canister puncture tools for this purpose. An unpunctured canister cannot be recycled and should not go in regular trash. Some outdoor retailers accept empty canisters for proper disposal.

    How do I cook at altitude?

    Water boils at a lower temperature at altitude — around 194°F at 10,000 feet compared to 212°F at sea level. This means longer cooking times for anything that requires boiling. Freeze-dried meals and instant foods are largely unaffected. For real cooking, add time rather than increasing heat — the temperature ceiling is lower regardless of how high your flame is.


    Prices are approximate at time of writing. As an Amazon Associate, we earn from qualifying purchases.

  • How to Layer Clothing for Backcountry Conditions

    Layering is the single most important clothing skill for anyone spending serious time in the backcountry. The Rockies in particular will throw every kind of weather at you — sometimes in the same afternoon. A sunny 70-degree morning at the trailhead can turn into a 40-degree, wind-driven rainstorm at 12,000 feet by 2pm.

    The layering system works because it lets you adapt. Add a layer when you stop moving. Shed a layer when you start sweating. Swap the shell when the rain arrives. Done right, you stay comfortable across a wide range of conditions without carrying more than you need.

    Here is how it works and what is worth buying.


    The Three Layer System

    Every backcountry clothing system is built around three layers, each doing a specific job. Understanding what each layer does makes it much easier to choose the right pieces and use them effectively.

    Layer 1 — The Base Layer: Moisture Management

    The base layer sits against your skin. Its job is to move sweat away from your body and dry quickly. A wet base layer in cold conditions pulls heat away from your body rapidly — which is why cotton is the one material everyone agrees you should leave at home. Cotton absorbs moisture and holds it, staying wet and cold against your skin.

    The two best base layer materials are:

    Merino wool — naturally odor-resistant, regulates temperature well in both cold and mild conditions, soft against skin, and does not feel clammy when damp. The trade-off is cost and durability — merino wears out faster than synthetics.

    Synthetic (polyester) — dries faster than merino, more durable, less expensive. The trade-off is odor — synthetics hold body odor more than wool on multi-day trips.

    For most Rocky Mountain backcountry use, merino is the better choice for its temperature regulation and odor resistance. For high-output activities where drying speed matters most, synthetic has the edge.

    For merino wool base layers I recommend SmartWool. I have been personally using SmartWool base layers for years.

    Mens SmartWool

    Womens SmartWool

    Weight to choose:

    • Lightweight — high-output activities, mild shoulder season conditions, summer at lower elevations
    • Midweight — general fall and spring use, cooler summer conditions above 10,000 feet
    • Heavyweight — cold winter conditions, low-output activities in the cold

    Layer 2 — The Mid Layer: Insulation

    The mid layer traps warm air close to your body and provides the bulk of your insulation. It goes on when you stop moving, when temperatures drop, or when you need extra warmth at camp.

    The main options are:

    Fleece — breathable, continues to insulate when damp, dries quickly, durable, and affordable. Grid fleece and lightweight fleece are excellent active insulation layers for high-output use. Heavier fleece works well as a standalone camp layer.

    [Recommended: Mens Marmot Upward Fleece]

    [Recommended: Womens Marmot Rocklin Fleece]

    Down insulation — the warmest insulation for its weight, compresses to almost nothing, and lasts for years with proper care. The weakness is performance when wet — down clumps and loses its insulating ability when soaked. Treated down (hydrophobic down) significantly improves wet performance and is worth the premium for Rocky Mountain use where afternoon thunderstorms are a daily reality in summer.

    [Recommended: Womens Outdoor Research Transcendent Down]

    [Recommended: Mens Outdoor Research Transcendent Down]

    Synthetic insulation — insulates when wet, dries faster than down. The trade-off is weight and bulk — synthetic insulation does not compress as well as down and is heavier for equivalent warmth. For consistently wet conditions, synthetic is the more reliable choice.

    [Recommended: Womens Outdoor Research Vesper Jacket]

    [Recommended: Mens Outdoor Research Vesper Jacket]

    Which to choose:

    • Fleece — active use, high-output hiking, versatile shoulder season layer
    • Down — cold and dry conditions, maximum warmth-to-weight, overnight trips
    • Synthetic — wet conditions, high humidity, slightly more bulky when packing

    Layer 3 — The Shell: Weather Protection

    The shell is your defense against wind, rain, and snow. It does not need to be warm on its own — that is the mid layer’s job. What it needs to do is keep the elements out while allowing moisture from the inside to escape.

    Hardshell — fully waterproof and windproof, designed for serious weather. The best hardshells use Gore-Tex or similar membranes that block rain while allowing water vapor from sweat to pass through. Essential for exposed ridge travel, sustained rain, and winter conditions.

    [Recommended: Womens Mammut Hardshell]

    [Recommended: Mens Mammut Hardshell]

    Softshell — more breathable and comfortable than hardshell, with some wind and water resistance. Not fully waterproof — in sustained heavy rain a softshell will eventually soak through. Best for high-output activities in variable but not severe conditions.

    [Recommended: Womens Marmot Softshell]

    [Recommended: Mens Marmot Softshell]

    Wind shell — ultralight, highly packable, blocks wind effectively, minimal water resistance. For dry conditions where wind chill is the main concern, a wind shell weighs almost nothing and adds meaningful warmth without bulk.

    [Recommended: Womens North Face Wind Shell]

    [Recommended: Mens North Face Wind Shell]

    Which to choose:

    • Hardshell — sustained rain, exposed alpine terrain, winter travel, serious weather
    • Softshell — active hiking in variable conditions without heavy rain
    • Wind shell — dry and windy conditions, ultralight travel, layering over insulation

    How to Layer in Practice

    Understanding the system is one thing. Using it well on the trail is another. Here is how it plays out in real Rocky Mountain conditions.

    The Most Common Mistake: Waiting Too Long to Adjust

    Most people wait until they are too hot or too cold before adjusting layers. By then you are already sweaty or chilled, and it takes time to recover. The goal is to stay just slightly cool when moving — if you are warm and comfortable at a standstill you will overheat within five minutes of hiking.

    A useful rule: if you are comfortable standing still at the trailhead, you are probably wearing one layer too many for the climb ahead.

    Stop and Adjust Before You Need To

    Anticipate changes rather than reacting to them. Before a long climb, shed a layer. Before a long descent into shade or wind, add one. Before stopping for lunch on an exposed ridge, put the mid layer on before you cool down — not after.

    The Reality of Rocky Mountain Afternoons

    In Colorado and much of the Rockies, afternoon thunderstorms are a near-daily occurrence from July through September. Plan your layers around the assumption that conditions will deteriorate between noon and 3pm. Your shell should be accessible — top of the pack, not buried at the bottom — every single day during summer months.

    Wind Changes Everything

    Wind chill at elevation is significant. A calm 50-degree day at 11,000 feet becomes genuinely cold with a 20 mph wind. A wind shell or light mid layer makes a huge difference in these conditions and weighs almost nothing to carry.


    Building a Rocky Mountain Layering Kit

    Here are two practical kit setups depending on your trip type.

    Summer Day Hiking — 8,000 to 13,000 feet

    • Lightweight merino or synthetic base layer top
    • Lightweight fleece or grid fleece mid layer
    • Packable hardshell or wind shell
    • Convertible hiking pants or lightweight softshell pants

    Total added weight over a t-shirt and shorts: roughly 1.5 to 2.5 lbs depending on choices. Worth every ounce above treeline.

    Multi-Day Backcountry Trip — Any Season

    • Midweight merino base layer top and bottoms
    • Lightweight fleece mid layer
    • Hydrophobic down or synthetic insulated jacket
    • Gore-Tex hardshell jacket and pants
    • Merino or synthetic buff and liner gloves

    This covers you from summer afternoons to cold nights at high camp and handles everything the Rockies are likely to throw at you across three seasons.

    Layering for Wildlife Viewing

    When your out hiking with the intention of viewing wildlife it is important to consider the color of clothing you choose. I like to dress in muted earth tones for all my layers, as well as carrying a lightweight camouflage layer that i can toss on while I’m sitting for long periods waiting for wildlife to photograph. I carry something like this ghillie suite when I’m out. I don’t wear it while hiking, rather I have it in my pack and toss it on when I’m sitting and waiting. It helps to break up your outline and blend in with surroundings.

    For more information on wildlife viewing check out these articles:

    Building a hide for wildlife viewing

    How to spot wildlife without disturbing it


    What to Look for When Buying Each Layer

    Base Layers

    • Material: merino wool or synthetic — no cotton
    • Weight: matched to your planned activity intensity and temperature range
    • Fit: close but not restrictive — base layers work best with minimal air gap between fabric and skin
    • Seam placement: flatlock seams reduce chafing under a pack

    Mid Layers

    • Packability: a mid layer you actually carry beats a warmer one left in the car
    • Zip: full zip gives more ventilation control than a half zip or pullover
    • Pockets: chest pockets keep phones and snacks warm and accessible
    • Helmet compatible hood: worth having on insulated jackets for alpine use

    Shells

    • Waterproof rating: look for at least 10,000mm hydrostatic head for reliable rain protection
    • Breathability rating: 10,000 g/m²/24h or higher keeps you from overheating on the climb
    • Pit zips: underarm zippers dramatically improve ventilation on hard uphill sections
    • Hood: should be helmet-compatible and adjustable with one hand
    • Packability: a shell that packs into its own pocket is worth the slight premium

    Frequently Asked Questions

    Is merino wool worth the extra cost?

    For most backcountry use, yes. The odor resistance alone makes it worth it on multi-day trips where you are wearing the same base layer for several days. The temperature regulation across a wide range of conditions is also genuinely better than synthetic. If budget is a concern, prioritize merino for your base layer top — the piece closest to your skin that matters most — and use synthetic for bottoms and secondary layers.

    How many layers do I actually need to carry?

    For a summer day hike in the Rockies: base layer, one mid layer, and a packable shell — three pieces total. For a multi-day trip or shoulder season travel: add a heavier insulation layer and hardshell pants. You rarely need more than four layers in the field — the goal is versatility through combination, not volume.

    Can I use a rain jacket as my shell?

    Yes — a quality waterproof rain jacket is a hardshell by another name. The key is breathability. A cheap waterproof jacket that does not breathe will soak you from the inside with sweat on a hard climb as effectively as rain soaks you from the outside. Look for a breathable waterproof membrane — Gore-Tex, eVent, or similar — rather than the cheapest waterproof option available.

    What about legs — do I need to layer those too?

    On most summer day hikes, convertible pants or lightweight hiking pants over a base layer bottom is sufficient. For cold, wet, or winter conditions, hardshell pants over a base layer make a significant difference. Many hikers under-invest in leg layering and pay for it on cold, wet descents.

    How do I care for technical layers?

    • Wash merino wool on a gentle cycle in cold water, lay flat to dry
    • Wash synthetic base layers inside out to reduce odor buildup
    • Use a technical wash like Nikwax for down and shell garments — standard detergent degrades waterproof coatings and down loft over time
    • Reactivate DWR coating on shells by tumble drying on low heat after washing
    • Never dry clean down garments


    Prices vary significantly by brand and retailer. As an amazon associate we earn from qualifying purchases.

  • Best Field Guides and Nature Apps for the Rocky Mountain West


    The Rockies are one of the most biodiverse regions in North America. From the shortgrass prairies of the Eastern Plains to the alpine tundra above 12,000 feet, the range of species — birds, mammals, wildflowers, trees, insects — is extraordinary. Knowing what you are looking at makes every trip richer.

    The good news is that between well-written field guides and a new generation of genuinely impressive smartphone apps, you have never had better tools for identifying and understanding Rocky Mountain wildlife. Here is what is actually worth carrying and downloading.


    Apps First — Because Your Phone is Always With You

    Smartphone apps have transformed field identification over the last decade. The best ones now use AI-powered image and sound recognition that would have seemed impossible ten years ago. For most common identification needs in the field, a good app beats a field guide for speed.

    Merlin Bird ID — Best Bird Identification App

    Price: Free | Developer: Cornell Lab of Ornithology

    Merlin is the gold standard for bird identification and it is completely free. The Sound ID feature listens to birds in real time and identifies every species it hears simultaneously — an almost magical experience the first time you use it in a meadow at dawn. The photo ID feature identifies birds from images with impressive accuracy, and the species database covers every bird you are likely to encounter in the Rockies.

    Download the Rocky Mountains bird pack before your trip for full offline functionality — essential when cell service disappears in the backcountry.

    Best for: Bird identification by sound and photo, building a trip list, learning bird calls


    iNaturalist — Best All-Species Identification App

    Price: Free | Developer: California Academy of Sciences / National Geographic

    iNaturalist identifies plants, mammals, insects, reptiles, amphibians, fungi, and more from photos using AI, then connects your observation to a global community of naturalists who can confirm or correct the identification. Every observation you log contributes to real biodiversity research — your sightings in Rocky Mountain National Park become part of the scientific record.

    The explore map lets you see what other naturalists have observed in any area before you visit, which is genuinely useful for trip planning and knowing what to look for.

    Best for: All-species identification, logging observations, trip planning research


    AllTrails Pro — Best Trail and Navigation App

    Price: Free basic / $36 per year for Pro | Developer: AllTrails

    AllTrails is not a species identification app but it belongs on this list because knowing the terrain is inseparable from finding wildlife. The Pro version adds offline maps, route planning, and detailed trail conditions — essential for backcountry use in the Rockies where trails are not always well-marked and cell service is unreliable.

    User reviews frequently include recent wildlife sightings, which makes it a useful real-time resource for knowing what is active on a specific trail right now.

    Best for: Trail navigation, offline maps, route planning, recent conditions


    OnX Hunt / OnX Backcountry — Best for Land Ownership and Boundaries

    Price: $30-$50 per year | Developer: OnX Maps

    OnX started as a hunting app but the Backcountry version is invaluable for any serious Rocky Mountain traveler. It shows public versus private land boundaries in real time — critical in Colorado where public and private land is intricately mixed and trespassing is easy to do accidentally. It also shows land management designations, wilderness boundaries, and motor vehicle use maps.

    Pair it with your Garmin GPS for a comprehensive navigation setup.

    Best for: Land ownership boundaries, public land navigation, wilderness area planning


    Picture This — Best Plant Identification App

    Price: Free basic / $30 per year for Pro | Developer: PictureThis

    Rocky Mountain wildflowers are spectacular and notoriously difficult to identify without help. Picture This identifies plants from photos with strong accuracy and provides detailed information on each species including toxicity — useful when foraging or if you have dogs in the field. The Pro version adds offline capability and a more detailed plant database.

    Best for: Wildflower and plant identification, foraging safety, botanical interest


    Field Guides Worth Carrying

    Apps are fast and convenient but a well-written field guide goes deeper — range maps, behavioral notes, habitat preferences, and the kind of contextual information that helps you understand a species rather than just name it. These are the guides worth having on your shelf and in your pack.

    Birds of Colorado Field Guide — Stan Tekiela

    Price: ~$15 | Format: Paperback, 360 pages

    Stan Tekiela’s state-specific field guides are consistently among the best value options available. The Colorado edition covers 140 species organized by color rather than taxonomy — unconventional but genuinely faster for identification in the field. Clear photos, concise descriptions, and range maps make it the most practical bird guide for Colorado hikers and wildlife watchers who are not hardcore birders.

    Best for: Casual to intermediate birders, Colorado-specific coverage, pack-friendly size


    Sibley Guide to Birds — David Allen Sibley

    Price: ~$40 | Format: Paperback, 624 pages

    The Sibley is the serious birder’s reference. Detailed illustrations showing multiple plumages and ages of each species, range maps, behavioral notes, and comprehensive coverage of every North American species make it the most complete single-volume bird guide available. It is heavier than the Tekiela guide and more than most casual observers need — but if birds are your primary interest in the field, it is worth every penny.

    Best for: Serious birders, comprehensive species coverage, plumage and behavioral detail


    Mammals of the Rocky Mountains — Various

    Price: ~$20 | Format: Paperback

    A solid regional mammal guide covering everything from elk and black bears to pikas, marmots, and small rodents. Habitat preferences, behavioral notes, and track identification sections make it useful both for planning where to look and for identifying sign in the field. The Rocky Mountain region has a remarkable diversity of mammals and a dedicated guide is worth carrying if wildlife watching is your primary purpose.

    Best for: Mammal identification, habitat and behavior notes, track identification


    Rocky Mountain Wildflowers — Various

    Price: ~$18 | Format: Paperback

    The Rockies produce some of the most spectacular wildflower displays in North America, particularly at subalpine elevations in July and August. A good wildflower guide organized by color is the most practical format for field use — find the color, flip to the section, match the photo. Look for a guide specific to Colorado or the Southern Rockies for the most relevant coverage.

    Best for: Wildflower identification, subalpine and alpine botany, summer trips


    Tracking and the Art of Seeing — Paul Rezendes

    Price: ~$25 | Format: Paperback, 320 pages

    This is not a standard field guide — it is a deep dive into animal tracking and reading sign in the landscape. Rezendes covers tracks, trails, scat, feeding sign, bedding areas, and territorial markings for North American mammals in a way that transforms how you move through and interpret a landscape. For anyone serious about wildlife observation rather than just species listing, this book is genuinely transformative.

    Best for: Wildlife trackers, serious observers, anyone who wants to read a landscape rather than just walk through it


    Building Your Kit

    You do not need everything on this list. Here is a practical starting point based on your interests:

    Casual day hiker and wildlife watcher:

    • Merlin Bird ID (free)
    • iNaturalist (free)
    • AllTrails Pro ($36/year)
    • Birds of Colorado Field Guide (~$15)

    Serious Rocky Mountain wildlife observer:

    • Everything above plus
    • Sibley Guide to Birds (~$40)
    • Mammals of the Rocky Mountains (~$20)
    • OnX Backcountry ($30-50/year)
    • Tracking and the Art of Seeing (~$25)

    Outdoor photographer:

    • Everything in the serious observer kit plus
    • Picture This Pro ($30/year) for plant identification at shooting locations
    • iNaturalist for documenting and dating observations

    Frequently Asked Questions

    Can I use these apps without cell service?

    Merlin, iNaturalist, AllTrails Pro, and OnX all offer offline functionality with downloaded content. Download maps, bird packs, and species databases before you leave cell service. Merlin’s Sound ID requires a downloaded bird pack to work offline. AllTrails Pro and OnX require pre-downloaded maps for offline navigation.

    Is iNaturalist accurate enough to rely on?

    For common species in good photo conditions, iNaturalist’s AI identification is impressively accurate. For rare species, unusual plumages, or poor quality photos, treat the AI suggestion as a starting point and use the community verification feature to get confirmation from expert naturalists. Never make foraging decisions based solely on an AI identification.

    Which is better — apps or field guides?

    Both have a place. Apps are faster for initial identification in the field. Field guides go deeper on behavior, habitat, range, and the contextual knowledge that makes you a better observer over time. The best setup is a free identification app for quick field use and one or two well-chosen field guides for deeper learning at home and in camp.

    Are there field guides specific to Rocky Mountain National Park?

    Yes — several publishers produce guides specific to RMNP covering birds, wildflowers, and mammals within the park boundaries. These are worth picking up if RMNP is a primary destination as they filter out species unlikely to be encountered there and add park-specific habitat and viewing location information.


    App prices and subscription rates are approximate at time of writing and subject to change. Book prices are approximate retail. Links point to Amazon search results — replace with your affiliate tracking links before publishing.

  • Best Spotting Scopes for Wildlife and Birding

    When setting out on a wildlife viewing adventure, its super helpful to have nice optics. It helps you keep a safe distance from the wildlife while still being able to have a nice viewing experience. If your new to optics start here to check out recommended Binoculars… If you already have a set of binoculars you know that they get you close, but a spotting scope gets you there. If you spend time watching wildlife at distance — scanning a mountainside for elk, tracking shorebirds across a mudflat, or studying raptors on a distant perch — a quality spotting scope opens up a level of detail that no binocular can match.

    The trade-off is size and weight. A spotting scope lives on a tripod, not around your neck. But for serious wildlife watchers and outdoor photographers, that trade-off is more than worth it.

    Here is what is worth buying in 2026.


    Quick Answer

    • Best overall: Vortex Diamondback 20-60×80 — excellent value, sharp image, great warranty (~$330)
    • Best budget pick: Celestron Ultima 80 — reliable, affordable, good starter scope (~$240)
    • Best mid-range: Vortex Viper HD — noticeably sharper glass than the Diamondback, worth the step up (~$700)
    • Best premium: Swarovski ATX 25-50×80 — the professional benchmark, exceptional in every condition (~$4,150)
    • Best compact travel scope: Kowa TSN-553 — lightweight, portable, surprisingly capable (~$500)
    • Best for digiscoping: Vortex Razor HD 27-60×85 — pairs exceptionally well with a smartphone or camera (~$1,700)

    Our Picks

    1. Vortex Diamondback 20-60×80 — Best Overall

    Price: ~$330 | Magnification: 20-60x | Objective lens: 80mm | Weight: 61.4 oz

    The Diamondback is the scope most people should start with. It delivers genuinely sharp, color-accurate images at a price that does not require a second mortgage. The 80mm objective lens pulls in enough light for solid performance at dawn and dusk, and the 20-60x zoom range covers everything from wide scanning to detailed close study.

    Vortex’s VIP lifetime warranty — which covers accidental damage at no charge — makes it an especially confident first purchase. For the price, the image quality is hard to fault.

    Pros:

    • Excellent value for the optical quality delivered
    • 80mm objective performs well in low light
    • Wide zoom range handles both scanning and detailed observation
    • Vortex VIP lifetime warranty covers accidents
    • Solid, durable build for field use

    Cons:

    • Image softens slightly at maximum 60x magnification
    • Heavier than compact alternatives at 61.4 oz
    • Not as sharp at the edges as mid-range and premium options
    • Eyepiece is not interchangeable

    2. Celestron Ultima 80 — Best Budget Pick

    Price: ~$240 | Magnification: 20-60x | Objective lens: 80mm | Weight: 42 oz

    If you want to try spotting scope wildlife watching without spending serious money, the Ultima 80 is a reasonable starting point. Image quality is adequate for general use in good light, and the 45-degree angled eyepiece is comfortable for extended viewing sessions. At this price the glass and build quality show their limitations — but for occasional use at accessible sites it does the job.

    Pros:

    • Very affordable entry point
    • 45-degree eyepiece angle is comfortable for long sessions
    • Lightweight at 42 oz
    • Decent image quality in good daylight conditions

    Cons:

    • Noticeable image degradation at higher magnifications
    • Poor low-light performance compared to mid-range options
    • Build quality reflects the price — not suitable for hard field use
    • Limited eye relief is uncomfortable for glasses wearers

    3. Vortex Viper HD — Best Mid-Range

    Price: ~$900 | Magnification: 20-60×85 | Objective lens: 85mm | Weight: 59.7 oz

    The Viper HD is where spotting scope optics start to get genuinely impressive. The HD glass produces noticeably sharper, more color-accurate images than the Diamondback — particularly at higher magnifications where budget scopes start to fall apart. If you are spending regular time in the field and want a scope that rewards serious use, the Viper HD is the sweet spot between price and performance.

    Pros:

    • HD glass delivers sharp, color-accurate images across the zoom range
    • Holds image quality well at maximum magnification
    • Fully waterproof and nitrogen purged
    • Rotating tripod mount allows quick switching between horizontal and vertical viewing
    • Vortex VIP lifetime warranty

    Cons:

    • Significantly more expensive than the Diamondback
    • Heavy at 59.7 oz — a quality tripod is essential
    • Fixed eyepiece — not interchangeable like premium modular systems

    4. Swarovski ATX 25-50×80 — Best Premium

    Price: ~$4,150 | Magnification: 25-50x | Objective lens: 80mm | Weight: 75 oz with eyepiece

    The ATX is what serious wildlife observers and field researchers reach for when image quality is the only consideration. The modular eyepiece system means you can swap objective modules without replacing the entire scope, and the optical performance — particularly in low light and at high magnification — is in a different league from anything below $1,500.

    If you spend significant time in the field and your scope is your primary tool, the ATX justifies its price. For everyone else it is aspirational.

    Pros:

    • Best-in-class optical performance in all conditions
    • Modular system — swap objective lenses without replacing the eyepiece
    • Exceptional low-light performance
    • Ergonomic design built for extended field sessions
    • Swarovski’s lifetime repair warranty

    Cons:

    • Extremely expensive — hard to justify for casual use
    • Heavy at 75 oz fully assembled
    • Requires a high-quality tripod to get the best from the optics
    • Modular system adds cost when expanding

    5. Kowa TSN-553 — Best Compact Travel Scope

    Price: ~$500 | Magnification: 15-45x with included eyepiece | Objective lens: 55mm | Weight: 28.2 oz

    The TSN-553 makes a compelling case that you do not always need an 80mm objective. At 28.2 oz it is significantly lighter than full-size scopes, fits more easily into a pack, and still delivers genuinely sharp images thanks to Kowa’s excellent glass quality. For hikers and backpackers who want spotting scope capability without the weight penalty, it is the most practical option available at this price.

    Pros:

    • Lightest scope in this guide at 28.2 oz
    • Excellent optical quality for the objective size
    • Compact and packable — fits alongside gear in a daypack
    • Interchangeable eyepiece system
    • Good close focus distance for versatile field use

    Cons:

    • 55mm objective gathers less light than 80mm alternatives — weaker at dawn and dusk
    • Lower maximum magnification than full-size scopes
    • More expensive than full-size budget options for a smaller objective

    6. Vortex Razor HD 27-60×85 — Best for Digiscoping

    Price: ~$1,700 | Magnification: 27-60x | Objective lens: 85mm | Weight: 70.5 oz

    Digiscoping — attaching a smartphone or camera to a spotting scope to capture images — has become one of the most popular ways to document wildlife sightings. The Razor HD is optimized for this use. The large 85mm objective, high-quality APO glass, and wide, flat field of view produce images that hold up well when photographed through the eyepiece. Paired with a phone adapter it is a capable wildlife photography setup at a fraction of the cost of a dedicated telephoto lens.

    Pros:

    • APO glass produces exceptional color accuracy and edge sharpness
    • 85mm objective maximizes light for photography use
    • Wide, flat field of view is ideal for digiscoping
    • Performs exceptionally well at all magnifications
    • Vortex VIP lifetime warranty

    Cons:

    • Heavy at 70.5 oz — needs a sturdy tripod
    • Expensive for a non-modular scope
    • Minimum magnification of 27x is higher than some competitors — less flexible for close work

    What to Look for When Choosing a Spotting Scope

    Objective Lens Size

    The objective lens diameter controls light gathering. Larger means brighter in low light but heavier to carry.

    • 50-60mm — compact and lightweight, good for daytime use and travel
    • 80mm — the sweet spot for most wildlife watching, good low-light performance
    • 85mm+ — best low-light and high-magnification performance, suits stationary use

    Straight vs. Angled Eyepiece

    This is a personal preference but it matters for comfort:

    • Straight — easier to aim quickly at a target, better for use from a vehicle, suits shorter tripods
    • Angled (45 degrees) — more comfortable for extended viewing sessions, easier when sharing with people of different heights, works better on taller tripods

    Most serious wildlife watchers prefer angled. If you are new to spotting scopes, try both before committing.

    Zoom Range and Magnification

    Most spotting scopes offer a zoom eyepiece covering a range like 20-60x. Higher magnification reveals more detail but amplifies heat haze and atmospheric distortion — on hot days or at very long distances, 60x can produce a worse image than 40x due to atmospheric shimmer. Start at lower magnification to find your subject and zoom in from there.

    Image Quality at High Magnification

    Budget scopes look reasonable at 20x but fall apart at 50-60x. If you plan to use high magnification regularly, the quality of the glass matters enormously. HD and APO glass hold sharpness and color accuracy across the full zoom range in a way that standard glass does not.

    Weight and Tripod Compatibility

    A spotting scope without a good tripod is a frustrating experience. Every scope in this guide needs a stable tripod — a flimsy $30 tripod will waste the optics. Budget at least $80 to $150 for a tripod if you do not already have one. Fluid head tripods designed for video work are particularly smooth for panning across a landscape.

    [Recommended: Vortex MTN Pass Tripod Kit]

    Digiscoping Capability

    If you want to photograph wildlife through your scope with a smartphone, look for a scope with a wide, flat eyepiece that accepts a phone adapter. Most quality scopes are compatible — Vortex, Kowa, and Swarovski all make dedicated phone adapters for their eyepieces.

    Recommended: Magsafe Digiscope Adapter]


    Spotting Scopes by Use Case

    Stationary Wildlife Watching — Meadows, Water Sources, Open Country

    For watching from a fixed position — a vehicle, a hide, or a hillside vantage point — image quality and low-light performance matter most. Go for an 80mm or larger objective.

    • Best choice: Vortex Viper HD
    • Budget option: Vortex Diamondback HD 20-60×80

    Hiking and Backpacking

    Weight is the priority. A compact 55-60mm scope on a lightweight tripod adds meaningful capability without destroying your pack weight budget.

    • Best choice: Kowa TSN-553

    Wildlife Photography and Digiscoping

    Optical quality and a wide flat field of view for camera attachment matter most. Pair with a sturdy tripod and a phone or camera adapter.

    • Best choice: Vortex Razor HD 27-60×85

    Serious and Professional Use

    When image quality is the only consideration and budget is not the limiting factor.

    • Best choice: Swarovski ATX 25-50×80

    Frequently Asked Questions

    Do I need a spotting scope if I already have binoculars?

    For most casual wildlife watching, quality binoculars are sufficient. A spotting scope earns its place when you are regularly watching at distances beyond 300 yards, studying behavior in detail, or photographing wildlife through the eyepiece. If you find yourself frequently wishing your binoculars could zoom in further, a spotting scope is the next logical step.

    What magnification do I need?

    For most wildlife watching, 20-40x covers the majority of situations. Higher magnification reveals more detail but is more sensitive to heat haze, atmospheric distortion, and tripod stability. A 20-60x zoom eyepiece gives you flexibility — use lower magnification to scan and find animals, then zoom in once you have located your subject.

    Do I need an 80mm objective?

    For general use in good light, a 60-65mm objective is adequate. For dawn and dusk viewing, or for digiscoping where image brightness matters, 80mm or larger makes a noticeable difference. If you are primarily watching in open daylight conditions, a compact 55-60mm scope saves significant weight without a major optical penalty.

    What tripod should I use with a spotting scope?

    A stable, mid-weight tripod is essential. Carbon fiber tripods save weight without sacrificing stability. Look for a tripod rated for at least 6 to 8 lbs — more than your scope’s weight — to ensure stability in wind. A fluid pan head makes smooth horizontal scanning much easier than a standard ball head.

    Can I use a spotting scope for stargazing?

    Yes — spotting scopes work well for casual astronomy, particularly for viewing the moon, planets, and star clusters. For serious astronomy a dedicated telescope is better optimized, but a quality 80mm spotting scope on a stable tripod delivers impressive views of the night sky and doubles your investment nicely.


    Prices are approximate at time of writing. As an Amazon Associate, we earn from qualifying purchases.

  • Best Water Filters for Backcountry Travel

    Clean water is not optional in the backcountry. Every natural water source — however clear and cold it looks — can carry pathogens that will put you on the ground within 24 hours. Giardia, cryptosporidium, and bacteria are invisible, odourless, and genuinely unpleasant to deal with hundreds of miles from a bathroom.

    The good news is that water treatment has never been lighter, faster, or more affordable. Here is what is worth carrying.


    A Quick Note on What You Are Filtering

    Most backcountry water sources in North America require protection against three things:

    • Bacteria — E. coli, salmonella, and others. Removed by most filters.
    • Protozoa — Giardia and cryptosporidium. Removed by most filters.
    • Viruses — Norovirus, hepatitis A, and others. Not removed by standard filters. Requires a purifier, UV treatment, or chemical treatment.

    In most North American wilderness, virus risk is low. In international travel or areas with high human activity near water sources, virus protection matters more. Know your destination and choose accordingly.


    Quick Answer


    Our Picks

    1. Sawyer Squeeze — Best Overall

    Price: ~$35 | Weight: 85g | Method: Hollow fiber | Virus protection: No

    The Sawyer Squeeze is the most popular backcountry water filter for good reason. It is light, fast, inexpensive, and rated to filter one million gallons before the manufacturer recommends replacement. You fill the included soft flask, screw on the filter, and squeeze clean water directly into your mouth or another container. It also attaches inline to a hydration reservoir or screws onto a standard water bottle.

    Backflushing — pushing clean water back through the filter with the included syringe — keeps flow rate high over time and extends the filter’s life indefinitely with proper care.

    For most North American backcountry trips, it is all you need.

    Pros:

    • Very affordable for the performance on offer
    • Lightweight and compact
    • Versatile — works as a squeeze filter, inline filter, or straw
    • Backflushable — maintains flow rate with regular maintenance
    • Effectively unlimited lifespan with proper care

    Cons:

    • Does not filter viruses
    • Flow rate slows if not backflushed regularly
    • Soft flasks included are adequate but not the most durable
    • Can freeze — protect in cold weather or it may crack and fail

    2. Sawyer Micro Squeeze — Best for Ultralight Travel

    Price: ~$30 | Weight: 56g | Method: Hollow fiber | Virus protection: No

    Same filtration technology as the Squeeze in a smaller, lighter package. The flow rate is slightly lower, but at 56g it is one of the lightest effective filters available. For ultralight backpackers counting every gram, the Micro is the logical choice. For everyone else, the standard Squeeze’s higher flow rate is worth the extra 30 grams.

    Pros:

    • Lightest effective filter in this guide
    • Same reliable filtration as the standard Squeeze
    • Very affordable
    • Backflushable

    Cons:

    • Slower flow rate than the standard Squeeze
    • Smaller included flask
    • Does not filter viruses

    3. MSR MiniWorks EX — Best Pump Filter

    Price: ~$130 | Weight: 370g | Method: Ceramic/carbon pump | Virus protection: No

    Pump filters have largely been displaced by squeeze filters for solo and lightweight travel, but they still have real advantages in specific situations. The MiniWorks EX works in any conditions including silty, murky, or partially frozen water that would clog a squeeze filter quickly. It can be fully disassembled and cleaned in the field without tools, which matters on long expeditions where filter maintenance is part of the routine.

    For group travel, base camps, or trips in challenging water conditions, it earns its extra weight.

    Pros:

    • Works in turbid, silty, and difficult water conditions
    • Fully field-maintainable without tools
    • Reliable and repairable over many years of use
    • Pumps directly into any container — no awkward squeezing or holding

    Cons:

    • Heavy at 370g compared to squeeze filters
    • Slower than squeeze filters for solo use
    • Pumping is physically tiring over large volumes
    • More expensive than comparable squeeze options

    4. SteriPen Adventurer Opti — Best UV Purifier

    Price: ~$120 | Weight: 90g | Method: UV light | Virus protection: Yes

    UV purifiers work differently from filters — instead of physically removing contaminants, they use ultraviolet light to destroy the DNA of pathogens, rendering them unable to reproduce. The SteriPen treats a litre of water in about 90 seconds and kills bacteria, protozoa, and viruses.

    The important caveat: UV treatment requires clear water to work properly. Turbid or silty water blocks UV light and reduces effectiveness. In murky conditions, pre-filter through a bandana or coffee filter before treating.

    For international travel or any destination where virus risk is a genuine concern, a UV purifier paired with a basic squeeze filter for sediment is a highly effective combination.

    Pros:

    • Kills viruses — most filters do not
    • Fast treatment time
    • No pumping or squeezing — just stir and wait
    • Leaves no chemical taste in the water
    • Lightweight and compact

    Cons:

    • Requires batteries or charging — a dead SteriPen is useless
    • Does not work effectively in turbid water without pre-filtering
    • More expensive than basic squeeze filters
    • Fragile compared to filter options — the UV lamp can break

    5. Katadyn Hiker Pro — Best for Groups

    Price: ~$100 | Weight: 310g | Method: Pleated glass fiber pump | Virus protection: No

    The Hiker Pro pumps faster than the MSR MiniWorks and handles moderately silty water well thanks to its pleated filter design. For small groups of two to four people where one person is filtering for everyone, the higher output and ease of use make it a practical choice. It is not the lightest option, but for the right group trip it pulls its weight.

    Pros:

    • Higher flow rate than most pump filters — good for group use
    • Handles moderately turbid water without immediate clogging
    • Easy to use and maintain
    • Attaches to standard water bottles and hydration reservoirs

    Cons:

    • Heavy for solo use
    • Filter cartridge replacement adds ongoing cost
    • Does not filter viruses
    • Pumping mechanism can feel stiff in cold conditions

    6. Aquatabs Water Purification Tablets — Best Emergency Backup

    Price: ~$35 | Weight: Negligible | Method: Chemical (NaDCC) | Virus protection: Yes

    Every pack should have a chemical backup regardless of what primary filter you carry. Filters can freeze, crack, get lost, or clog beyond recovery. Aquatabs weigh almost nothing, cost almost nothing, treat viruses as well as bacteria and protozoa, and take up less space than a chapstick.

    The downsides are the 30-minute wait time and a slight chemical taste — both acceptable trade-offs for an emergency option you genuinely hope never to need.

    Pros:

    • Near-zero weight and cost
    • Kills viruses, bacteria, and protozoa
    • Works in any water conditions
    • Indefinite shelf life if stored dry

    Cons:

    • 30-minute wait time before water is safe to drink
    • Slight chemical taste
    • Less effective in very cold or turbid water
    • Not a replacement for a primary filter on a real trip — a backup only

    Which Method is Right for You?

    Solo day hikes and weekend trips in North America — Sawyer Squeeze or Micro Squeeze. Light, fast, affordable, no moving parts to fail.

    Multi-day trips in challenging water conditions — MSR MiniWorks EX or Katadyn Hiker Pro. Worth the weight if your water sources are silty or you need to filter large volumes reliably.

    International travel or high-traffic water sources — SteriPen paired with a squeeze filter, or chemical tablets as a backup. Virus protection matters more in these environments.

    Emergency and backup — Aquatabs in every pack, every trip, no exceptions.


    A Few Things Worth Knowing

    Always carry a backup. Filters fail, freeze, and get dropped in rivers. A small chemical backup costs $10 and weighs nothing. There is no reason not to carry one.

    Cold kills hollow fiber filters. A frozen Sawyer Squeeze can crack internally and fail silently — meaning it looks fine but no longer filters effectively. Keep it in your sleeping bag or an inner pocket overnight in freezing temperatures.

    Backflush your Sawyer regularly. Flow rate slowdown is the most common complaint about Sawyer filters, and it is almost always caused by not backflushing often enough. A 30-second backflush every few uses keeps it running like new.

    Pre-filter turbid water. Silty or murky water clogs hollow fiber filters fast and reduces UV effectiveness. Running water through a bandana, buff, or coffee filter before treating extends filter life significantly and improves UV treatment reliability.


    Frequently Asked Questions

    Do I need virus protection in North America?

    In most North American backcountry, virus risk from natural water sources is low and a standard filter covering bacteria and protozoa is sufficient. Risk increases near areas of high human activity — popular campgrounds, heavily used trails, areas downstream of agriculture. For international travel, virus protection is worth prioritising.

    How long does a Sawyer filter last?

    Sawyer rates the Squeeze to one million gallons, which is effectively a lifetime for recreational use. The key is regular backflushing to maintain flow rate and keeping it from freezing. A well-maintained Sawyer Squeeze should last many years of regular backcountry use.

    Can I use a water filter in saltwater?

    No. Standard backcountry filters and purifiers are designed for freshwater sources and do not remove salt. Desalination requires reverse osmosis equipment. Do not attempt to drink filtered saltwater — the salt remains and will dehydrate you faster.

    What is the difference between a filter and a purifier?

    A filter physically removes bacteria and protozoa by passing water through a membrane with pores small enough to trap them. A purifier goes further — either through chemical treatment or UV light — to also neutralise viruses, which are too small to be caught by most filter membranes. In practice, most North American backcountry users need a filter. Travellers to regions with higher virus risk benefit from a purifier.

    Prices are approximate at time of writing. As an Amazon Associate, we earn from qualifying purchases.

  • Best Trekking Poles for Backcountry Travel


    Trekking poles are one of those pieces of gear that feel unnecessary until you actually use them — and then you wonder how you managed without them. On a long descent with a loaded pack, across a slippery stream crossing, or grinding up a steep ridge at the end of a long day, a good pair of poles makes a tangible difference to both comfort and stability.

    The market runs from $30 bargain options to $200+ ultralight carbon designs. Here is what is actually worth buying.


    Quick Answer


    Our Picks

    1. Black Diamond Trail Ergo Cork — Best Overall

    Price: ~$130 | Weight: 508g per pair | Material: Aluminum | Adjustment: Flick lock, 62–140cm

    The Trail Ergo Cork is the pole most people should buy. The ergonomic cork grip reduces hand fatigue on long days, the FlickLock adjustment is fast and secure, and the build quality holds up to years of regular use. Cork grips have a natural advantage over foam and rubber in warm conditions — they absorb sweat rather than getting slippery, which matters on a long summer day.

    The extended grip below the main handle lets you choke up on steep descents without stopping to readjust length — a small feature that becomes genuinely useful on technical terrain.

    Pros:

    • Cork grip is comfortable over long mileage in warm conditions
    • Extended grip allows quick length adjustment on the move
    • FlickLock collars are fast to adjust and stay put under load
    • Durable aluminum build holds up to hard use
    • Wide adjustment range suits most heights

    Cons:

    • Heavier than carbon alternatives at 508g per pair
    • Cork can feel cold and stiff in very cold conditions
    • Not the most packable option for travel

    2. Foxelli Carbon Fiber Trekking Poles — Best Budget Pick

    Price: ~$55 | Weight: 440g per pair | Material: Carbon fiber | Adjustment: Twist lock, 61–132cm

    Carbon fiber poles at $55 sounds too good to be true. In Foxelli’s case it is mostly legitimate — these are a genuine entry point into lightweight poles without the price tag of Black Diamond or Leki. They are not as bombproof as more expensive options and the twist-lock mechanism is less confidence-inspiring than a FlickLock under heavy lateral stress, but for moderate trails and occasional use they perform well above their price point.

    Pros:

    • Carbon fiber construction keeps weight low at a budget price
    • Lightweight enough to notice the difference on long days
    • Good value for occasional hikers or those new to poles
    • Comfortable foam grip handles most conditions adequately

    Cons:

    • Twist-lock mechanism is less secure than lever-lock systems under stress
    • Less durable than premium poles over extended hard use
    • Tips and baskets wear faster than higher-end options

    3. Black Diamond Distance Carbon Z — Best Ultralight

    Price: ~$185 | Weight: 240g per pair | Material: Carbon fiber | Adjustment: Fixed length (multiple sizes)

    240 grams per pair. That is extraordinarily light — about the weight of a small apple. The Z-pole folding design collapses into three sections and stashes in seconds, which makes them practical for fast-and-light hiking, trail running, or any trip where poles go in the pack as much as in your hands.

    The trade-off for that weight is fixed length — you choose your size when you buy. No adjustment means no fine-tuning for uphill versus downhill, which is a real limitation for mixed terrain over long distances. For flat to moderate terrain and users who know their preferred pole length, they are exceptional.

    Pros:

    • Lightest poles in this guide at 240g per pair
    • Fold-down design packs away quickly and compactly
    • Ideal for trail running, fast hiking, and ultralight trips
    • Extremely packable — fits alongside a pack or in a side pocket

    Cons:

    • Fixed length — no adjustment for terrain or different users
    • Less suitable for heavily varied terrain where length changes matter
    • More expensive than adjustable aluminum alternatives
    • Carbon can snap rather than bend under sudden lateral stress

    4. Black Diamond Alpine Carbon Cork — Best for Heavy Loads and Rough Terrain

    Price: ~$230 | Weight: 436g per pair | Material: Carbon fiber | Adjustment: FlickLock, 95–125cm

    The Alpine Carbon Cork is built for exactly what the name suggests — carrying heavy loads over serious terrain. The carbon fiber construction keeps weight low despite the robust build, and the FlickLock Pro mechanism is one of the most reliable adjustment systems available, holding firm under the lateral stress that heavy pack hiking puts on poles. The cork grip is excellent and the shorter adjustment range is optimized for aggressive mountain terrain rather than casual trail use.

    If you regularly carry a heavy pack in demanding conditions and want poles that keep up without adding weight, this is the one.

    Pros:

    • Carbon construction keeps weight low despite bomber build quality
    • FlickLock Pro is among the most reliable adjustment mechanisms available
    • Excellent cork grip comfortable over long high-output days
    • Handles heavy load stress better than aluminum alternatives
    • Lighter than comparable aluminum poles at 436g per pair

    Cons:

    Adjustment range less suited to casual or varied terrain hiking

    Shorter adjustment range — check sizing before buying, best for medium to tall users

    Carbon can snap rather than bend under sudden extreme lateral force

    More expensive than aluminum alternatives


    What Actually Matters When Choosing

    Material: Aluminum vs. Carbon

    Aluminum poles are heavier, cheaper, and bend rather than break under stress. Carbon poles are lighter and stiffer, but can snap suddenly under lateral force — particularly relevant if you use poles aggressively for balance on rough terrain or in stream crossings. For most recreational hikers, aluminum is the more forgiving choice. For weight-conscious backpackers on moderate terrain, carbon is worth considering.

    Adjustment Mechanism

    Lever lock (FlickLock, Speed Lock) — fast, reliable, visible when locked, holds under load. The better choice for most hikers.

    Twist lock — lighter and simpler, but harder to verify as locked and more likely to slip under heavy lateral stress. Fine for casual use, less reassuring in demanding conditions.

    Fixed/folding — no adjustment at all. Lightest option, best for users with a known preferred length who prioritise packability.

    Grip Material

    Cork — best for warm conditions and long days; absorbs sweat, moulds slightly to your hand over time, comfortable in heat.

    Foam — light and warm to the touch in cold conditions; absorbs moisture rather than shedding it, which can get uncomfortable on long wet days.

    Rubber — durable and warm, but can cause blisters on long days in warm conditions. Better suited to cold-weather use.

    Wrist Straps

    Good wrist straps let you transfer weight through the strap rather than gripping the pole tightly — which reduces hand fatigue significantly on long descents. Look for padded, adjustable straps that can be loosened and tightened quickly. On technical terrain or stream crossings, release the straps entirely so a fall does not drag the pole with you.


    Tips for Getting the Most Out of Trekking Poles

    Set the right length. Standing upright holding the pole, your elbow should be at roughly 90 degrees. Shorten slightly for uphill, lengthen for downhill — most experienced hikers adjust automatically.

    Use the straps properly. Thread your hand up through the loop from below, then grip the handle with the strap across your palm. This lets the strap take weight rather than your grip.

    Plant behind your foot on descents. On steep downhill terrain, planting the pole slightly behind your leading foot gives a braking effect and takes load off your knees — the main reason most people find poles worth carrying.

    Swap tips for terrain. Most poles come with carbide tips for dirt and rock. Rubber tip covers are worth adding for use on hard surfaces and wooden boardwalks where metal tips are loud, slip easily, and damage the surface.


    Frequently Asked Questions

    Do I really need trekking poles?

    No — but most people who try them on a long or loaded trip do not go back. The benefit is most noticeable on long descents (significantly reduces knee stress), on rough or loose terrain (improves balance), and during stream crossings (provides a third point of contact). If you have had knee issues or carry a heavy pack regularly, poles are worth trying before dismissing.

    One pole or two?

    Two. One pole provides some balance benefit but misses the bilateral load-sharing that makes the real difference on long descents and rough terrain. If you only want to carry one, a single adjustable pole is better than nothing — but two is the practical standard for good reason.

    How long should my trekking poles be?

    A rough starting point: elbow at 90 degrees when standing upright holding the grip. Most people land between 105 and 125cm. Adjustable poles let you dial this in precisely and modify for terrain. If buying fixed-length poles, measure carefully before ordering.

    Can trekking poles replace tent stakes?

    Some ultralight trekking pole tents are designed to use poles as their primary support structure, which saves significant weight. If you are building a system around this, make sure your poles are the right length for the tent design and that the tips fit the tent’s pole cups. Not all poles are compatible with all trekking pole shelters.

    Prices are approximate at time of writing. As an Amazon Associate, we earn from qualifying purchases.

  • How to Spot Wildlife Without Disturbing It

    The best wildlife encounters are the ones the animal doesn’t know about. A deer feeding undisturbed at the edge of a meadow, a fox working a field edge at dawn, an owl sitting perfectly still in a tree while you watch from 60 feet away — these moments happen when you get everything right. Movement, wind, noise, timing, patience.

    This guide is about developing those skills. Not chasing wildlife, not pushing for a closer look, but learning to move through a landscape in a way that lets you see more by intruding less.


    Why Staying Non-Intrusive Matters

    Disturbing wildlife has consequences beyond a spoiled sighting.

    Animals that are repeatedly flushed from resting or feeding areas burn energy they need for survival. Nesting birds that flush can expose eggs or chicks to cold, rain, or predators. Mammals disturbed during winter may exhaust critical fat reserves. Animals that lose their wariness of humans can become food-conditioned, which rarely ends well for them.

    There is also a simpler reason: you will see more. An animal that knows you are there either leaves or shuts down into defensive stillness. An animal that does not know you are there behaves naturally — feeding, interacting, moving through its range — which is what most people came to see.

    The goal is not invisibility. It is minimizing your footprint in the landscape enough to be present without being a disturbance.


    Understanding Animal Behavior and Body Language

    Knowing what you are looking at — and what it means — is one of the most useful skills in wildlife observation. An animal that seems calm may be one wrong move from bolting. An animal that looks alert may settle if you stay still.

    Stress Signals to Recognize

    Most animals give clear signals before they flee. Learning to read them lets you stop, hold position, and sometimes recover the encounter rather than pushing the animal over its threshold.

    Common stress signals across many species include:

    • Head up, ears forward — the animal has detected something and is assessing the threat
    • Freezing in place — active assessment; the animal is deciding whether to flee
    • Foot stomping or tail flagging — escalating alarm, particularly in deer
    • Alarm calls — vocalizations that alert other animals in the area (and tell you the encounter is likely over)
    • Moving away slowly — the animal is uncomfortable but not yet panicked; holding still may help
    • Explosive flight — threshold crossed; pursuit is pointless and stressful for the animal

    When you see any of these signals, stop. Do not advance. Give the animal time to reassess. If it settles and returns to normal behavior, you can often resume slow, careful movement.

    What Relaxed Behavior Looks Like

    A relaxed animal feeds continuously, moves unhurriedly, interacts with others in its group, and keeps its head down for extended periods. This is what you are aiming for — an animal comfortable enough in your presence to behave naturally.

    Reaching this point usually requires patience, appropriate distance, and arriving in position before the animal does rather than approaching it once it is already there.


    Reading the Landscape for Likely Wildlife Locations

    Finding wildlife starts before you arrive on site. The landscape itself tells you where animals are likely to be.

    Edges and Transitions

    The boundary between two habitat types — woodland and meadow, scrub and open grassland, farmland and hedgerow — concentrates wildlife activity. These edges offer food, cover, and quick escape routes simultaneously. Most species favor them.

    When you look at a map or scan a hillside, the places where habitats meet are almost always the most productive places to watch.

    Water Sources

    In dry conditions especially, water sources draw almost everything. A reliable pond, stream, or seep in otherwise dry terrain will have regular visitors at predictable times. Setting up near water and waiting is one of the most consistently productive wildlife-watching strategies.

    South-Facing Slopes and Sheltered Spots

    Animals, like people, seek warmth and shelter. South-facing slopes warm up first in the morning and stay warmer through the day. Sheltered valley bottoms and woodland edges cut from prevailing wind are preferred resting areas in cold or windy weather.

    Signs on the Ground

    Before you decide where to watch, look for evidence of activity:

    • Tracks and trails in soft ground or mud
    • Scat indicating regular use of an area
    • Feeding signs — stripped bark, dug ground, browsed vegetation
    • Beaten paths through grass or undergrowth
    • Wallows, scrapes, or rubbing posts

    These signs tell you not just that animals are present but which species, roughly how recently, and where they are traveling. A well-worn trail through a gap in a fence line is worth setting up near. A random patch of open woodland with no sign is probably not.


    Using Wind Direction and Scent Awareness

    Most mammals have a far better sense of smell than humans, and many birds are more alert to wind-borne disturbance than people expect. Scent management is one of the most overlooked aspects of wildlife watching — and one of the most impactful.

    Always Know Where the Wind Is Going

    Before you approach any area you want to watch, establish the wind direction. Your scent travels downwind in a cone from your position. Any animal downwind of you will know you are there long before it can see or hear you.

    Position yourself upwind of where you expect animals to be, or crosswind if upwind is not possible. Moving downwind toward a target almost always ends the encounter before it begins.

    A simple way to check wind direction: a few threads of light material tied to your optics strap, or a small puff of light powder or dust.

    Minimize Artificial Scents

    Strongly scented products travel far and are out of place in a natural landscape. Before a wildlife-watching session:

    • Avoid strongly scented soaps, shampoos, and deodorants
    • Skip perfume, cologne, and heavily scented sunscreen
    • Be aware that food smells — a sandwich in your pack, coffee on your breath — are detectable to mammals at significant distance

    You do not need to be odorless. You need to be less interesting than whatever the animal is already focused on.


    How to Move Quietly and Slowly Through Terrain

    Movement is the primary trigger for wildlife alarm. The human eye is extraordinarily good at detecting movement, and most animals are even better at it. How you move through a landscape matters enormously.

    Slow Down More Than You Think Necessary

    Most people move through wildlife habitat far too quickly. A walking pace that feels comfortable covers ground faster than most wildlife observation requires. Aim to move at roughly half your normal pace in areas you are actively watching, with frequent stops to observe.

    Step With Intention

    Noise underfoot is mostly avoidable with attention:

    • Place feet heel-to-toe, feeling for debris before committing your weight
    • Avoid dry sticks, leaf litter, and loose rock where possible
    • In woodland, look two or three steps ahead to plan your footing
    • Move more slowly over noisy ground rather than trying to rush through it

    Use Available Cover

    You do not need specialist camouflage to move through a landscape less conspicuously. Use available cover — trees, boulders, vegetation, folds in the ground — to break your outline and reduce how visible you are from a distance.

    Move between pieces of cover rather than across open ground. Pause in cover to scan ahead before moving again.

    [Recommended: Neutral-Colored Outdoor Clothing]

    Avoid Skylining

    Standing on a ridgeline or hilltop against the sky makes you visible for enormous distances. Drop below the ridge to move along it, and only scan from the top when necessary. This is one of the simplest and most effective ways to reduce how far your presence is broadcast across a landscape.


    Ideal Viewing Distances and Using Optics

    The single most useful thing you can do for wildlife observation is invest in good optics and use them from a respectful distance, rather than trying to get physically closer.

    Let Optics Do the Work

    A quality pair of binoculars or a spotting scope lets you observe natural behavior from a distance that does not cause stress to the animal. You see more, the animal stays relaxed, and the encounter lasts longer.

    [Recommended: Lightweight Binoculars]

    [Recommended: Compact Spotting Scope]

    General Distance Guidelines

    These vary by species, season, and individual animal, but as a starting framework:

    • Large mammals (deer, elk, bear) — 300 feet minimum; more during breeding season or with young
    • Nesting birds — give wide berth; any sign of stress means you are too close
    • Raptors at a perch or nest — 600 feet or more; they are highly sensitive to approach
    • Small mammals and birds feeding — 60 to 150 feet is often achievable if you move carefully and slowly

    The right distance is always the one at which the animal is showing no stress signals. That varies. Watch the animal, not a number.

    Arrive Early and Wait

    The most effective wildlife-watching technique is also the least glamorous: get to a good spot before the animals do, settle in, and wait. Approaching an animal that is already in position almost always triggers some level of stress response. Being in position when it arrives means it finds you as part of the landscape.


    Best Times of Day for Watching Wildlife

    Timing matters more than almost any other variable in wildlife observation.

    Dawn and the First Hours of Morning

    This is consistently the most productive window for most species. Animals that have been resting overnight begin moving, feeding, and interacting as light arrives. The landscape is quieter, human disturbance is minimal, and low-angle light makes movement easier to spot.

    Getting to your viewing position before first light — settled and still as the landscape wakes up around you — produces more encounters than any other approach.

    The Evening Window

    The hour or two before dusk mirrors the morning activity peak. Animals feed again before settling for the night. Light is softer, temperatures drop, and activity picks up after the quiet of midday.

    Midday

    For most species in most conditions, midday is the least productive time. Animals rest in cover during the warmest part of the day. It is a good time to scout new locations, review maps, or simply rest.

    Exceptions include raptors, which use midday thermals for soaring, and overcast days where the temperature differential between morning and midday is smaller and animals may remain active longer.

    Seasonal Considerations

    • Spring — breeding season increases activity and vocalization; many species are visible and vocal at unusual times
    • Fall — rutting season for deer and elk makes large mammals unusually active and visible; also a productive period for bird migration
    • Winter — reduced cover means animals are easier to spot; tracks in snow are invaluable for reading a landscape; dawn and dusk windows are compressed

    Common Mistakes That Scare Wildlife Away

    Moving Too Quickly

    The most common mistake by a significant margin. Slow, deliberate movement is almost always better. If you are moving at a pace where you are thinking about anything other than the next footstep, you are probably moving too fast.

    Wearing the Wrong Colors

    Bright colors — particularly blues and whites — stand out strongly in natural landscapes and are visible to many animals. Neutral tones — olive, tan, brown, gray — blend more effectively. You do not need specialist camouflage, but leaving the bright red jacket at home makes a real difference.

    Talking at Normal Volume

    Conversation-level noise carries far in quiet habitat, particularly over water or in still morning air. If you are with others, keep voices low. Save conversation for open, windy conditions where ambient noise provides cover.

    Using Phones and Screens Outdoors

    Bright screens are highly visible in low light. Notification sounds — however brief — are jarring in quiet habitat. Put your phone on silent before entering wildlife areas and keep screen brightness low.

    Approaching Too Directly

    A direct, straight-line approach toward an animal is perceived as threatening by most species. If you need to move closer, do so on an angled or indirect path, pausing frequently. Moving parallel to an animal and gradually reducing the angle is far less threatening than walking straight at it.

    Staying Too Long After Stress Signals Appear

    Once an animal shows clear stress signals, continuing to watch or photograph from the same position compounds the disturbance. Back away quietly and give the animal space to settle. Coming back another day — or finding a better position — will produce a better encounter than pushing past an animal’s comfort threshold.

    Ignoring Wind

    Approaching upwind of mammals almost never works. Scent arrives before you do and the animal is gone before you see it. Checking wind direction before every approach is a habit that pays off every single time.


    A Note on Patience

    Wildlife observation rewards patience more than almost any other outdoor skill. The instinct to move toward something interesting, to get closer, to act — runs counter to what actually works. The best encounters usually come from staying still, staying quiet, and letting the landscape settle around you.

    The wildlife you see when you get it right — behaving naturally, unhurried, unaware of your presence — is a different thing entirely from a startled animal disappearing into cover. It is worth the patience it takes to get there.

  • Safe Camping in Bear Country: Practical Tips for Reducing Risk

    Safe Camping in Bear Country: Practical Tips for Reducing Risk

    Bears are a sign of healthy wilderness. If you are camping in bear country, you are camping somewhere worth being — and with a little preparation, you can do it safely and confidently.

    The vast majority of bear encounters are non-events. Bears that become a problem in campgrounds almost always do so because someone, somewhere along the line, made it easy for them to associate humans with food. The goal of bear-safe camping is simple: keep that association from forming in the first place.

    Here is what that looks like in practice.


    Understanding Bear Behavior

    Before worrying about what to do when things go wrong, it helps to understand why bears approach camps at all.

    Curiosity, Not Aggression

    Most bears that wander into or near a campsite are not being aggressive — they are being opportunistic. They have learned, or are learning, that human camps sometimes contain food. A bear sniffing around your camp at 2am is almost certainly there because something smells interesting, not because it wants a confrontation.

    This distinction matters because it shapes how you respond. A curious, food-motivated bear behaves very differently from a defensive bear surprised at close range, or the rare predatory bear that has lost its wariness of people entirely.

    The Two Scenarios Worth Knowing

    Defensive encounters happen when a bear is startled, feels cornered, or is protecting cubs or a food source. These are by far the most common type of serious bear encounter. Making noise while moving through bear habitat prevents most of them before they start.

    Food-conditioned encounters happen when a bear has learned that camps mean food. These bears are bold, persistent, and harder to deter. They are almost always the result of poor food storage practices — by you or by campers before you.


    Choosing a Safe Campsite

    Where you camp matters as much as how you behave once you get there.

    Look for Signs of Bear Activity

    Before setting up, scan the area for:

    • Fresh scat, tracks, or digging
    • Claw marks on trees
    • Overturned rocks or logs
    • Signs of a nearby food source (berry patches, fish streams, carcasses)

    None of these are reasons to panic, but they are reasons to look for a different spot or be especially careful with food storage.

    Separate Your Sleeping and Cooking Areas

    This is one of the most consistently recommended practices by wildlife managers, and one of the most commonly ignored by campers in a hurry.

    Set up your sleeping area at least 200 feet away from where you cook, eat, and store food. This puts distance between a bear’s interest and where you are sleeping, and it means any bear investigating food smells is not doing it two feet from your tent.

    The classic backcountry layout is a triangle: sleeping area, cooking area, and food storage each at separate points, all at least 200 feet apart.

    Avoid Natural Bear Corridors

    Bears use the same landscape features humans do — ridge lines, valley bottoms, stream edges, and saddles. Camping directly on these travel routes increases the chance of a close encounter. Look for a site slightly off the obvious line of travel, with reasonable visibility around the tent.


    Food and Scent Management

    This is where most bear problems in camp begin and end. Bears have an exceptional sense of smell — estimates suggest it is seven times more powerful than a bloodhound’s. Anything with an odor is a potential attractant.

    What Counts as a Scent Attractant

    Most people think about food. The list is longer than that:

    • All food and drinks, including sealed packaging
    • Cooking equipment and utensils
    • Garbage and food wrappers
    • Toiletries — toothpaste, lip balm, sunscreen, insect repellent, soap
    • Scented clothing, including anything you cooked in
    • Empty food containers, even washed ones
    • Pet food

    Everything on this list should be stored away from your sleeping area every night, without exception.

    Keep Scents Out of Your Tent

    This sounds obvious. In practice, it means not eating in or near your tent, not keeping a snack bar in your sleeping bag pocket, not leaving a lip balm in a jacket hanging inside the tent, and changing out of clothes you cooked in before going to sleep.

    A tent offers no physical barrier to a bear. It is fabric. The only thing keeping a bear out of your sleeping area is the absence of anything interesting enough to investigate.

    [Recommended: Odor-Proof Storage Bag]


    Proper Food Storage Methods

    How you store food depends on where you are camping and what resources you have available. There are three main approaches.

    Bear Canisters

    Hard-sided bear canisters are the most reliable food storage method for backcountry camping. They are required in many wilderness areas and strongly recommended everywhere else. A quality canister is effectively impervious to bears — they cannot crush it, pry it open, or carry it away.

    [Recommended: Bear-Resistant Food Canister]

    A few practical notes on canisters:

    • Store the canister at least 200 feet from your tent, ideally behind a boulder or in a depression so it cannot be rolled away easily
    • Do not leave it at the base of a cliff or near a water source — bears can and do knock canisters into water or over edges
    • Keep the lid on whenever you are not actively loading or unloading it

    Bear Hangs

    A properly executed bear hang suspends your food bag between two trees, at least 12 feet off the ground and 6 feet from the trunk on either side. Done well, it is effective. Done poorly — and it frequently is — it is not.

    The main challenge is finding suitable trees at the right distance apart, in terrain where that is not always possible. In areas with available trees and no canister requirements, a hang is a practical option. In areas with short or sparse trees, a canister is more reliable.

    Vehicle Storage

    If you are car camping or using your vehicle as a base camp, a locked vehicle is a reasonable food storage option in most areas — with some important caveats.

    • Keep all food and scented items in the trunk or a closed container, out of sight
    • Do not leave anything with a scent on the seats or dashboard
    • Some bear populations — particularly in areas like Yosemite — have learned to associate coolers and bags with food even through car windows
    • A hard-sided cooler locked in a closed vehicle is not the same as a hard-sided cooler sitting on a picnic table

    In areas with specific regulations about food storage in vehicles, check local requirements before your trip.


    Cooking and Eating Safely in Camp

    Cook Away From Your Sleeping Area

    Use your designated cooking area consistently. Keep it well away from your tent. Over multiple nights, food smells accumulate — cooking in the same spot each night concentrates those scents in one location away from where you sleep.

    Minimize Spills and Residue

    Spilled food on the ground, grease on a camp stove, or leftover scraps in a pan all contribute to scent load around camp. Clean up thoroughly after every meal:

    • Pack out all food scraps — do not bury them
    • Clean cookware as soon as possible after eating
    • Strain dishwater and pack out food particles; dispose of gray water well away from camp
    • Burn off any residue on a camp stove grate if conditions allow

    What to Do With Garbage

    Pack it out. All of it. Burning food waste is not effective — it leaves scent residue in ash and partially burned material. Burying garbage is worse — bears are skilled excavators and it simply marks the spot for them.

    Store garbage with your food in your bear canister or hang. It counts as an attractant just as much as the food itself.


    What to Do if a Bear Approaches Camp

    Stay calm. Most camp visits by bears are resolved simply by being present, making noise, and standing your ground.

    Make Yourself Known

    If you see a bear approaching or in your camp, do not run. Make yourself large, speak in a firm, calm voice, and make it clear you are human. Most bears will disengage when they realize the camp is occupied.

    Stand Your Ground

    Retreat signals to a food-conditioned bear that persistence works. Hold your position, make noise, and give the bear a clear escape route. In most cases it will take it.

    Use Bear Spray if Necessary

    Bear spray is your most effective deterrent in a close encounter. It is more effective than firearms in stopping a bear charge and significantly easier to deploy accurately under stress.

    [Recommended: Bear Spray]

    Keep it accessible — on your hip or attached to a tent zipper at night — not buried in your pack. A bear spray canister at the bottom of your bag is not useful in a 10-second encounter.

    Important: Bear spray is for close encounters. It is not a repellent and should never be applied to gear, tents, or clothing.

    Give It an Escape Route

    A bear that feels cornered is more likely to become defensive. When encouraging a bear to leave, position yourself so the bear has a clear, unobstructed path away from camp. Do not corner it against a cliff, a body of water, or a dense thicket.


    Avoiding Surprise Encounters While Moving Through the Landscape

    Most serious bear encounters happen at close range when a bear is surprised. The fix is simple: make noise.

    Make Noise on the Trail

    Talk, call out, clap your hands at irregular intervals — especially when approaching blind corners, moving through dense vegetation, crossing streams (where noise masks your approach), or traveling in low light. You do not need to shout constantly. You need to be audible enough that a bear at 100 to 130 feet knows you are coming.

    Bear bells are popular but inconsistent — they produce a soft, repetitive sound that is easy for ambient noise to mask. Your voice is more effective.

    Travel in Groups Where Possible

    Groups are louder, smell stronger, and are perceived as more imposing by bears. Solo travelers in bear country should be especially diligent about making noise. There are very few recorded serious bear encounters involving groups of four or more people.

    Pay Attention to Wind Direction

    Bears rely heavily on smell. If the wind is at your back, your scent travels ahead of you and bears have warning. If you are moving into the wind, bears may not detect your approach until you are very close. Be especially vocal when moving into the wind.

    Be Alert at Dawn, Dusk, and After Dark

    Bears are most active in early morning and evening. Slow down, make more noise, and pay closer attention to the terrain ahead during these windows. Use a headlamp after dark so you can see — and be seen — clearly.

    Recognize Feeding Areas and Give Them Space

    Dense berry patches, avalanche chutes thick with vegetation, stream edges during fish runs, and areas with visible digging or scat are active feeding areas. Move through them loudly and give bears a wide berth if you spot one feeding. A bear focused on food is a bear with reduced awareness of its surroundings — which increases the chance of a surprise encounter.


    A Final Note

    Bear-safe camping is mostly habit. The first few trips require conscious effort — checking that the food is stored, cooking away from the tent, keeping the lip balm out of the sleeping bag. After a while it becomes automatic, the same way checking your map or filtering water does.

    The goal is not to make the backcountry feel dangerous. It is to behave in a way that keeps both you and the bears in it safe — because a bear that learns to associate camps with food almost always ends up being a bear that has to be removed or destroyed. The best outcome for everyone is a bear that passes through your camp, finds nothing interesting, and moves on.

    That is entirely within your control.


    Always check local regulations for food storage requirements before entering wilderness areas. Requirements vary by region and are strictly enforced in many national parks and wilderness zones.

  • Best GPS Units and Satellite Communicators for Backcountry Travel

    Cell service ends. Trails don’t.

    If you spend real time in the backcountry — solo trips, remote wildlife sites, multi-day routes in the mountains — a satellite communicator is the one piece of kit that can actually save your life when everything else goes wrong. It is not dramatic to say that. It is just the reality of travelling in areas where your phone is a paperweight and the nearest help is hours away.

    The good news is that the devices have gotten smaller, cheaper, and easier to use. Here is what is worth buying in 2026.


    Quick Answer

    • Best overall: Garmin inReach Mini 2 — small, reliable, does everything (~$300)
    • Best budget pick: SPOT Gen4 — one-way messaging, affordable plans (~$150)
    • Best for serious expeditions: Garmin inReach Messenger Plus — bigger screen, longer battery, built-in GPS (~$400)
    • Best for groups: Zoleo Satellite Communicator — seamless phone integration, good value plans (~$150)
    • Best standalone device: Garmin inReach Mini 2 — works without a phone paired (~$300)

    Our Picks

    1. Garmin inReach Mini 2 — Best Overall

    Price: ~$300 | Weight: 100g | Battery: up to 14 days tracking | Network: Iridium (global)

    The Mini 2 is the one most people should buy. It is genuinely small — about the size of a thick lighter — runs for two weeks in tracking mode, and works on the Iridium network, which means it has truly global coverage including the poles. Two-way messaging lets you send and receive texts from anyone, and the SOS button connects directly to GEOS, a 24/7 search and rescue coordination centre.

    Pair it with the Garmin Explore app and your phone becomes a full mapping interface. The device itself handles communication if the phone dies or breaks.

    Pros:

    • Tiny and light enough to forget you’re carrying it
    • True global coverage via Iridium
    • Two-way messaging — not just check-ins
    • Works standalone without a phone
    • Solid battery life for extended trips

    Cons:

    • Monthly subscription required (plans start around $15/month)
    • Small screen makes standalone use a bit fiddly
    • No built-in mapping on the device itself

    2. SPOT Gen4 — Best Budget Pick

    Price: ~$150 | Weight: 117g | Battery: up to 7 days | Network: Globalstar

    If you want satellite SOS capability without spending $350, the SPOT Gen4 gets you there. It does not provide maps or navigation, but It sends preset check-in messages, tracks your route, and triggers an SOS — all for less than half the price of the Garmin. The trade-off is that messaging is one-way only: you can send, but you cannot receive. You will not know if help is coming.

    For casual users who mainly want peace of mind on day trips or weekend outings, that limitation is liveable. For anyone going deep into remote terrain for multiple days, the inability to receive messages is a real gap.

    Pros:

    • Much more affordable than Garmin inReach options
    • Cheaper monthly plans
    • Simple, easy to use — one button for SOS
    • Lightweight and compact

    Cons:

    • One-way only — you can’t receive messages
    • Globalstar network has coverage gaps, particularly outside North America
    • No mapping or navigation features
    • Less reassuring in a genuine emergency when you can’t confirm help is coming

    3. Garmin inReach Messenger Plus — Best for Longer Expeditions

    Price: ~$400 | Weight: 150g | Battery: up to 28 days tracking | Network: Iridium (global)

    The Messenger Plus is what you pick when you are going out for a long time and want a bigger screen and more battery. The 28-day tracking battery life is genuinely impressive, and the larger display makes it much easier to read and respond to messages without squinting. It also has a built-in GPS for basic navigation without a paired phone.

    If the Mini 2 is the device you barely notice, the Messenger Plus is the one you reach for on a two-week expedition where communication matters as much as emergency use.

    Pros:

    • 28-day battery life in tracking mode is class-leading
    • Larger screen makes messaging much easier
    • Built-in GPS for standalone navigation
    • Full two-way messaging via Iridium

    Cons:

    • Heavier than the Mini 2 at 150g
    • More expensive
    • Bigger form factor is less pocketable

    4. Zoleo Satellite Communicator — Best for Groups and Regular Travellers

    Price: ~$150 | Weight: 142g | Battery: up to 200 hours | Network: Iridium (global)

    Zoleo takes a phone-first approach. The device pairs tightly with the Zoleo app and lets you message through your regular contacts list — the same experience as texting, but via satellite. It also gives you a dedicated satellite email address and phone number, which makes staying in touch with people back home more natural than the clunky preset-message systems on older devices.

    Similar to Spot , Zoleo does not provide mapping or navigation, but having the capability to keep in contact with loved ones takes the worry off of you and them.

    Plans start lower than Garmin’s, which makes it a good option if you travel regularly and want to keep subscription costs reasonable.

    Pros:

    • Seamless phone integration — feels like texting, not a field radio
    • Dedicated satellite phone number and email address
    • Competitive monthly plan pricing
    • Full two-way messaging and SOS
    • Good battery life

    Cons:

    • More dependent on a paired phone than the Garmin options
    • Slightly bulkier form factor
    • Less established track record than Garmin in the field

    What Actually Matters When Choosing

    Two-way vs. one-way messaging. This is the most important decision. One-way devices (SPOT) let you send check-ins and SOS alerts but cannot receive replies. Two-way devices (Garmin, Zoleo) let you have an actual back-and-forth conversation. For solo backcountry travel, two-way is worth the extra cost.

    Network coverage. Iridium (used by Garmin and Zoleo) covers the entire globe including oceans and poles. Globalstar (used by SPOT) has gaps, particularly outside North America. If you travel internationally or in high latitudes, Iridium is the safer choice.

    Subscription plans. Every satellite communicator requires a monthly plan. Budget for it. Garmin’s plans start around $15/month for basic use; SPOT’s are comparable; Zoleo’s tend to be slightly cheaper for regular messaging users. Most allow you to suspend service between trips, which helps if you only go out a few times a year.

    Battery life. Most devices run for several days to two weeks on a charge. Cold temperatures reduce this — keep the device in an inner pocket overnight in winter. A dead communicator in an emergency is no communicator.


    Frequently Asked Questions

    Do I really need a satellite communicator?

    If you hike in areas with reliable cell coverage and always go with other people, probably not. If you regularly go solo, travel to remote areas, or do multi-day trips where cell coverage is patchy, yes — the cost of a device and a basic plan is trivial compared to the value of being able to call for help or let someone know you are okay.

    What is the monthly subscription cost?

    Plans vary by provider and usage level. Garmin inReach plans start around $15/month for basic tracking and limited messages, up to $65/month for unlimited messaging. SPOT plans start around $12/month. Zoleo starts around $20/month. Most allow you to pause or cancel between seasons.

    Can I use these instead of a GPS?

    The inReach Mini 2 and Messenger Plus both have basic GPS tracking and work with the Garmin Explore app for mapping. For serious navigation, a dedicated GPS device is still the better tool. For most users who just need to know where they are and send a message, the inReach paired with a phone handles both jobs adequately.

    What happens when I press SOS?

    The device sends your GPS coordinates and a distress signal to a monitoring centre (GEOS for Garmin devices) that operates 24/7. They assess the situation, attempt to contact you and your emergency contacts, and coordinate with local search and rescue services. The process is well-established — Garmin inReach devices have facilitated thousands of rescues.


    Prices are approximate at time of writing. Subscription plans and pricing change — check current rates on each manufacturer’s website before purchasing. As an Amazon Associate, we earn from qualifying purchases.