Blog

  • How to Use Your Car or Truck as a Base Camp for Outdoor Trips

    You do not need a dedicated overlanding rig or a custom camper van to use your vehicle as a base for outdoor adventures. A standard car, SUV, or truck can serve as a surprisingly capable base camp for hiking trips, fishing weekends, hunting seasons, or multi-day outdoor excursions — without major modifications or significant expense.

    This is not about building the perfect overlanding setup. It is about using what you already have, more intentionally, so that your time outdoors is more comfortable and your gear is easier to manage.


    Why Using Your Vehicle as a Base Camp Works

    Most outdoor trips involve a lot of time near your vehicle. You drive to a trailhead, set up somewhere nearby, and use your vehicle as the central point for food, gear, rest, and shelter. Leaning into that reality — rather than fighting it with a tent and gear spread across a campsite — makes a lot of practical sense.

    There are several reasons vehicle-based camping works well in practice:

    • Your gear stays dry. Rain, dew, and condensation are the enemy of comfort on any trip. Everything stored in your vehicle is protected without any effort.
    • You are never far from a road. Access to help, supplies, or a quick exit in an emergency is simpler than deep backcountry camping.
    • You are not carrying everything on your back. This means you can bring more comfort items — a proper sleeping pad, better food, more layers — without the weight penalty of backpacking.
    • Setup and breakdown are faster. You are not pitching and striking camp each day.
    • Vehicles are relatively secure. A locked vehicle keeps food, electronics, and valuables safer than a tent or bear box.

    This style of camping suits a wide range of activities: day hiking from a fixed point, fishing trips, hunting camp, mountain biking, or simply using a remote spot as a quiet base for several nights.


    How to Organize Your Gear Inside Your Vehicle

    The biggest challenge with vehicle-based camping is staying organised. Without a system, everything devolves into a pile that takes ten minutes to search every time you need something. The goal is to know where everything is without unpacking the whole vehicle.

    Start With Zones

    Think of your vehicle in three zones: things you need frequently, things you need daily, and things you need rarely. Frequently used items — water, snacks, a headlamp, a first aid kit — should be within arm’s reach. Daily use items like cooking gear and extra layers go in the middle layer. Rarely used items like spare tyre equipment or emergency gear go at the bottom or in hard-to-reach corners.

    Use Containers, Not Bags

    Soft bags collapse and mix together into an unmanageable heap. Rigid containers — plastic tote bins, ammunition cans, hard-sided coolers — stack neatly, stay organised, and protect their contents. Label each one clearly.

    Keep a dedicated food bin, a gear bin, a clothing bin, and a tools and recovery bin. If something does not fit cleanly into one of those categories, it probably does not need to come on the trip.

    [Recommended: Mikkuppa Auto Organizer]

    Cargo Management Accessories

    A cargo net, cargo barrier, or bed divider prevents gear from shifting while driving and keeps the load from creeping into the cab. For trucks, a bed organiser or bed slide system makes rear access far easier without having to climb in.

    [Recommended: Mikkuppa Auto Organizer]
    [Recommended: Decked Truck Bed Organizer]

    In SUVs and hatchbacks, a cargo shelf or drawer system creates vertical space and keeps sleeping areas clear of gear. Even a simple folding shelf from a hardware store works well for this purpose.

    Keep the Cab Clear

    Whatever is in the rear cargo area, the cab should stay functional. Keep it free of gear creep — one bag maximum in the cab, with everything else in its designated zone in the back. Cab clutter becomes a genuine safety issue when driving on rough tracks in low light.
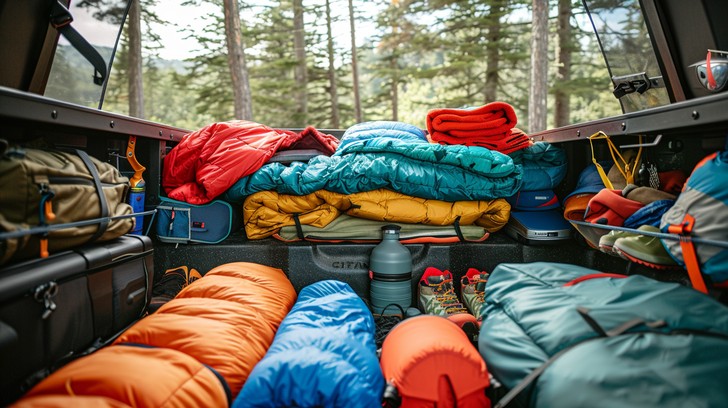

    Sleeping Setups

    You do not need to spend thousands of dollars on a rooftop tent or a full camper conversion to sleep comfortably in or beside your vehicle. There are a few practical approaches depending on your vehicle type and how much work you want to do.

    Sleeping in the Cargo Area (SUVs and Wagons)

    Most mid-size and large SUVs can accommodate a sleeping platform with the rear seats folded flat. The main challenges are the uneven floor from the folded seat gap and the total length of the cargo area.

    A simple plywood platform cut to fit bridges the seat gap and provides a level sleeping surface. This does not need to be a permanent build — a removable platform that slides in when needed and stores in a garage the rest of the time works perfectly well.

    On top of the platform, a self-inflating sleeping pad or quality foam mat provides comfort and insulation from the cold vehicle floor.

    Length is the limiting factor for taller people. Measure your cargo area before committing to this setup — some SUVs are just long enough, and some are not.

    Sleeping in a Truck Bed

    A truck bed is a natural sleeping platform, particularly on full-size trucks. The main requirements are a sleeping pad, a sleeping bag rated for the expected low temperature, and some form of weather protection.

    A truck bed tent pitches over the bed using the bed walls as a frame. These are simple to set up, relatively inexpensive, and provide solid weather protection without permanent modifications.

    [Recommended: Truck Bed Tents]

    If weather is not a concern, sleeping on a pad directly in the bed under a clear sky is one of the more pleasant ways to spend a night outdoors. For security and weather protection without a tent, a hard or soft tonneau cover provides a waterproof, lockable enclosure — though ventilation needs to be managed carefully.

    Sleeping Beside the Vehicle

    Sometimes the simplest setup is a tent or bivy pitched right beside the vehicle, using it as a windbreak and gear storage rather than a sleeping space. This works well when the vehicle is small, when you are travelling with multiple people, or when you simply prefer sleeping on the ground. ***Be sure to account for proper food storage when camping in bear country!!! The last thing you want is a hungry bear breaking into the car looking for dinner!***

    The vehicle becomes your kitchen, gear locker, and dry storage. The tent is just for sleeping. It is a clean, low-fuss approach that most people can execute with gear they already own.

    Temperature and Condensation

    Sleeping inside a vehicle in cold weather requires attention to ventilation. A fully sealed vehicle will accumulate significant condensation from breathing overnight — enough to soak fabric surfaces and sleeping bags. Leave a window cracked slightly or use a magnetic window vent to allow airflow without rain ingress.

    In hot weather, the reverse problem applies. A vehicle heats up quickly in direct sun and stays warm long after dark. Shade, airflow, and a reflective windshield cover make a material difference to sleeping temperature.


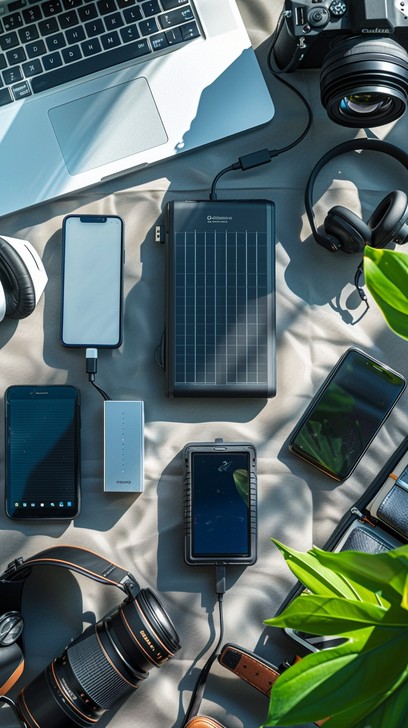
    Power and Charging Solutions

    Modern outdoor trips often involve devices that need power: phones, GPS units, cameras, headlamps, and communication devices. A vehicle-based setup gives you more power options than backpacking, but managing it properly still requires some thought.

    Your Vehicle’s 12V System

    Every vehicle has a 12V outlet (the old cigarette lighter socket) and most modern vehicles have USB ports built in. These work for trickle charging phones and small devices while the engine is running, but they will drain your starter battery if used for extended periods with the engine off.

    Running accessories from your main starter battery with the engine off is a real risk. A flat starter battery in a remote location is a genuine problem. The simplest solution for short trips is to charge devices while driving and use a separate power source at camp.

    Portable Power Stations

    A portable power station — a large rechargeable battery with AC outlets, USB ports, and a 12V output — is the most practical power solution for vehicle-based camping. You charge it from your vehicle while driving or at home before departure, and use it at camp without any risk to your starter battery.

    [Recommended: Portable Power Station (500Wh to 1000Wh)]

    For most weekend trips, a 500Wh unit is more than sufficient. For longer trips or when running more demanding devices, a 1000Wh unit gives comfortable headroom. Look for a unit with USB-C Power Delivery, at least two AC outlets, and a clear remaining capacity indicator.

    Dual Battery Systems

    For regular vehicle-based camping, a dual battery system — a second battery dedicated to accessories and isolated from the starter battery — is the proper long-term solution. Installation is roughly a half-day job for a mechanic and provides a reliable, permanent power source for all camping use.

    This is worth considering if vehicle-based camping is something you do regularly. It is not necessary for occasional trips.

    Solar

    A portable solar panel propped on the dashboard or laid on the roof can supplement a portable power station or secondary battery during the day. In full sun, a quality 100W panel can meaningfully extend your power availability over a multi-day trip.

    (see article on backcountry solar)

    Solar is most useful on stationary multi-day trips. On trips where you are driving daily, the alternator charges your power station adequately without needing solar input.


    Lighting and Visibility at Night

    Good lighting at a vehicle base camp makes a bigger difference to comfort and function after dark than most people expect until they have experienced a well-lit versus a poorly-lit camp setup.

    Camp Lighting Around the Vehicle

    A lantern or work light that illuminates the area immediately around the vehicle handles most camp tasks — cooking, gear retrieval, and camp organisation. LED lanterns have largely replaced fuel lanterns for this purpose: they are cheaper to run, safer, last far longer on a charge, and produce no carbon monoxide.

    For working in the cargo area, a rechargeable LED work light or a strip of LED tape lighting attached inside the tailgate or hatch frame provides good task lighting without having to hold anything.

    Personal Lighting: Headlamps

    A headlamp is the most useful personal lighting tool at camp — it keeps your hands free and puts the light exactly where you are looking. Keep one in the cab and one in the sleeping area so you are never searching for light in the dark.

    (See article on headlamps)

    Red Light Mode

    A red light setting on a headlamp or lantern preserves night vision and is less disruptive to nearby people and wildlife. Worth using for moving around camp once you are oriented, rather than always running full white light.

    Visibility for Safety

    If your camp is near a road, track, or area with vehicle traffic, a flashing amber or red light on a visible surface of your vehicle adds a useful safety margin. Magnetic emergency LED lights are inexpensive and serve this purpose well.


    Weather Considerations

    Weather is the variable that most affects comfort at a vehicle base camp. Thinking through your setup before you arrive — rather than improvising on arrival in the dark — pays dividends every time.

    Wind

    Wind is the biggest comfort issue at exposed campsites. Your vehicle is a natural windbreak — position it to shelter your cooking and living area from the prevailing wind direction. Check which direction the wind is coming from before committing to a position when you arrive.

    A lightweight tarp or side awning extending from the vehicle creates a sheltered outdoor living area that makes cooking, eating, and gear organisation comfortable in significant wind and light rain.

    [Recommended: Samout Side Awning]

    Rain

    Rain changes the calculus significantly. Everything you need to do outside the vehicle needs to be accessible and efficient — faffing with gear in heavy rain leads to wet interiors and a miserable camp.

    A few habits make rain management easier:

    • Keep frequently accessed items in the same place every trip so you can retrieve them without unpacking in the rain
    • A small mat outside the entry point of the vehicle keeps mud and water from tracking in
    • A microfibre towel near the entry keeps surfaces dry
    • Cook under a tarp rather than in the vehicle — carbon monoxide from stoves accumulates rapidly in enclosed spaces

    Never cook inside a closed vehicle with any fuel-burning stove. This is a carbon monoxide risk and applies regardless of how cold or wet conditions are outside.

    Cold Weather

    Cold significantly affects both comfort and equipment performance. A few practical points worth knowing before a winter trip:

    • Batteries — phone, GPS, headlamp — lose performance rapidly below -5°C. Keep them in a sleeping bag or inside clothing overnight. Use lithium batteries rather than alkaline for any critical device.
    • A quality sleeping bag rated below the expected low temperature matters more than any other piece of sleep kit. Cold from below is often the bigger problem — a sleeping pad with a good R-value insulates effectively from a cold vehicle floor.
    • A 12V heated blanket run from a power station can take the edge off in shoulder-season cold without requiring a full cold-weather sleep system.

    Heat and Summer Conditions

    Heat is an underestimated base camp challenge. A vehicle parked in direct sun becomes genuinely dangerous in warm weather — interior temperatures can exceed the ambient air temperature by 20°C or more.

    Park in shade wherever possible. A reflective windshield cover and window shades dramatically reduce interior heat gain. In summer conditions, sleeping inside a vehicle is only comfortable with adequate ventilation — at minimum, windows cracked on both sides to create airflow.


    Keeping Things Simple and Efficient

    The appeal of vehicle-based camping is that it sits between backpacking minimalism and bringing absolutely everything. The temptation is to fill every available space because you can. The reality is that an overpacked vehicle is almost as frustrating to live out of as an overpacked backpack.

    Pack for the Trip, Not for Every Possibility

    If there is a 5% chance you will use something, it probably does not need to come. This applies especially to tools, spare parts, and “just in case” gear that tends to multiply across trips.

    Build a Standardised Kit

    Having a consistent set of bins — food bin, cooking bin, sleep kit, clothing, tools — that you replenish after each trip means packing takes minutes rather than an hour of reassembly. Once the system is built, the effort per trip drops significantly.

    Keep a Trip Checklist

    Not because you will forget the obvious things, but because the non-obvious things — a headlamp, matches, a first aid kit top-up — are what actually gets forgotten. A simple list on your phone takes five minutes to build and saves real problems in the field.

    Do a Gear Audit After Each Trip

    Anything you did not use is a candidate to leave home next time. Anything that caused friction — hard to access, wrong container, missing piece — is worth solving before the next trip while the memory is fresh.

    Clean Out Between Trips

    Leaving gear in a vehicle between outings creates clutter, allows food smells to accumulate, and means you never know exactly what is in there when you need something. A proper cleanout after each trip takes twenty minutes and makes every subsequent trip easier to pack for.

    The goal is a vehicle that is genuinely ready to go, with everything in its place, in under an hour of packing. That is achievable with a bit of system-building — and it makes the outdoor time itself far more relaxed.


    Frequently Asked Questions

    What size vehicle do I need for base camp camping?

    Almost any vehicle works, though more space is obviously more comfortable. A full-size SUV or truck provides the most flexibility. Compact SUVs and crossovers work well with a little creativity. Even a standard sedan can serve as a base camp if you pitch a tent alongside it for sleeping and use the vehicle for gear storage and shelter. The key is working with what you have rather than waiting for the ideal vehicle.

    Do I need to modify my vehicle?

    No. A cargo net, some tote bins, and a sleeping pad are enough for a functional setup. Modifications like roof racks, drawer systems, and dual battery setups are worth considering if you camp frequently, but they are not prerequisites for getting started.

    How do I deal with food storage and wildlife?

    Store food in hard-sided containers inside a locked vehicle. Do not leave food, scented items (toothpaste, soap, sunscreen), or rubbish visible through windows — this attracts wildlife in areas with bears and other animals. A cooler inside the locked vehicle is sufficient for most areas. In bear country with specific regulations, check local requirements before your trip. Many campsites offer bear proof storage for food and any other items that may attract unwanted visitors.

    Is it safe to sleep inside a vehicle?

    Yes, with appropriate ventilation. The main risks are carbon monoxide (never use fuel-burning stoves or heaters in a closed vehicle), overheating in summer (always ensure adequate airflow), and cold (use an appropriate sleeping bag and insulation). Crack a window or use a ventilation screen even in cold weather to prevent dangerous condensation build-up and ensure fresh air circulation.

    Can I run a heater inside my vehicle?

    Dedicated 12V vehicle heaters designed for in-car use — such as diesel-powered parking heaters — are safe when installed and operated correctly, as they draw combustion air from and exhaust to the outside. Propane heaters designed for indoor use, camping stoves, or any combustion device not specifically designed for enclosed vehicle use should never be run inside a closed vehicle under any circumstances.

    Bear Safety Considerations.

    I want to emphasize the importance of bear safety when using your vehicle as a base camp. I’ve had a few close encounters myself, and I know people who have had their vehicles broken into by bears. Taking a little extra caution can make a big difference.

    Don’t let the risk discourage you from getting out there—but do have a plan. Proper food storage and minimizing scents around your vehicle are critical in bear country. With the right approach, using your vehicle as a base camp can still be safe and effective.

    I’ll be putting together a separate guide focused specifically on camping in bear country, which will go into more detail.

    (See article on camping in bear country)

    Prices vary based on retailer. As an Amazon Associate we earn from qualifying purchases .

  • How to Keep Batteries Warm in Cold Weather

    If you have ever watched your phone die at -5°C despite showing 40% battery, or had your headlamp fade to almost nothing on a winter hike, you have experienced the most frustrating quirk of battery chemistry: cold kills performance, fast.

    It does not matter how new your batteries are or how fully charged they started. Below freezing, even the best lithium cells lose a significant portion of their usable capacity. The good news is that the fix is simple — warmth. This guide covers why cold affects batteries, which types are most vulnerable, and exactly what to do about it in real outdoor conditions.


    Why Cold Weather Drains Batteries

    Batteries generate electricity through a chemical reaction between two electrodes and an electrolyte. Cold temperatures slow that chemical reaction down — sometimes dramatically. The battery still has its full charge stored, but it cannot release that energy fast enough to power your device.

    The result is that your device reads a low or dead battery, shuts down, or underperforms — even though the battery recovers most of its capacity as soon as it warms up again. You have not lost the charge. You have temporarily lost access to it.

    At around -10°C, a standard alkaline battery can lose up to 50% of its usable capacity. Lithium batteries handle cold far better, but they are not immune. Below -20°C, even quality lithium cells begin to struggle.


    Which Battery Types Handle Cold Best

    Not all batteries respond to cold in the same way. Understanding the differences helps you make better gear choices for winter trips.

    Lithium (Primary)

    Lithium AA and AAA batteries are the gold standard for cold weather use. They maintain performance down to around -40°C, weigh less than alkaline equivalents, and have a long shelf life. They cost more, but for winter hiking, mountaineering, or any cold-weather trip, they are the only sensible choice for devices that take replaceable batteries.

    • Best cold-weather performance of any replaceable battery type
    • Rated to -40°C by most manufacturers
    • Lighter than alkaline — a practical bonus for backpacking
    • Longer shelf life — good for emergency kits and infrequently used gear

    Lithium-Ion (Rechargeable)

    The lithium-ion cells inside phones, GPS devices, cameras, and rechargeable headlamps handle cold better than alkaline but worse than primary lithium batteries. They typically start losing performance noticeably below 0°C and can shut down a device around -20°C even with charge remaining.

    Lithium-ion also suffers permanent capacity damage if charged in freezing temperatures — so avoid plugging in your phone or power bank when both are still cold from being outside.

    Alkaline (Standard AA/AAA)

    Alkaline batteries are the worst performers in cold weather. At 0°C they lose around 20 to 30% of capacity. At -10°C that can reach 50% or more. They are cheap and widely available, but if you rely on alkaline batteries for critical gear in winter, you will be disappointed.

    • Acceptable for mild cold (around 0°C to -5°C) with careful management
    • Avoid for primary navigation, safety lighting, or emergency use in winter
    • Keep in an inside pocket if you must use them

    NiMH Rechargeable

    Standard NiMH rechargeables perform better than alkaline in the cold but worse than lithium. Panasonic Eneloop Pro cells are specifically rated for lower-temperature use than standard NiMH and are a reasonable choice for moderate cold if you prefer rechargeables for environmental or cost reasons.


    Practical Methods for Keeping Batteries Warm

    The strategies below are drawn from real-world winter hiking, mountaineering, and cold-weather camping. They range from simple and free to worth spending a little money on.

    1. Keep Devices and Batteries Close to Your Body

    Body heat is your most reliable battery warmer in the field. An inside jacket pocket keeps a phone, GPS, or spare batteries at close to core temperature regardless of the air temperature outside.

    • Store your phone in an inner chest pocket, not an outer shell pocket
    • Keep spare batteries in a small pouch inside your mid-layer or base layer pocket
    • At night in a tent, sleep with your phone, GPS, and spare batteries inside your sleeping bag or in a clothing layer at the bottom
    • Camera batteries lose performance quickly — keep a spare warm in your pocket and swap them out as needed

    This costs nothing and is the single most effective technique available. The difference between a phone in an outer shell pocket and one in an inner fleece pocket at -10°C is often the difference between a device that works and one that shuts down.

    2. Use an Insulated Battery Case or Pouch

    A small insulated case or pouch adds a layer of thermal protection between your batteries and the cold air. These are particularly useful when a device must be used outside rather than kept in a pocket — cameras, GPS units, and radios that you need to access regularly.

    • Neoprene cases provide basic insulation and are available for most phone models
    • Generic insulated pouches work well for spare battery storage on the trail
    • Camera-specific battery cases are designed for exactly this purpose and worth carrying if you shoot in winter

    3. Use Hand Warmers Alongside Batteries

    Air-activated hand warmers generate heat for several hours and are lightweight enough to carry in bulk. Placing one alongside spare batteries in a small zip-lock bag inside your pack creates a warm microclimate that keeps cells at a usable temperature throughout the day.

    • HotHands single-use warmers are widely available and cost-effective
    • Reusable electric hand warmers with a built-in power bank serve double duty as both a warmer and a small charger
    • Do not place warmers in direct contact with bare lithium-ion cells for extended periods — aim for warmth, not heat

    4. Insulate Your Device Directly

    For devices that need to be mounted externally — GPS units on a handlebar, a phone on a chest mount, or a camera worn around the neck — wrapping the device in a thin insulating sleeve adds meaningful protection when body heat is not an option.

    • Insulated phone sleeves designed for ski and outdoor use combine thermal protection with touchscreen-compatible windows
    • Even wrapping a device in a spare buff or thin fleece layer helps in a pinch

    5. Carry a Compact Power Bank as a Buffer

    A compact power bank acts as a buffer between your charging source and your phone. In cold weather, a high-quality power bank that you keep warm in an inner pocket performs far more reliably than your phone’s internal battery exposed to cold air — meaning you can let the phone stay cold, keep the power bank warm, and charge when needed.

    • Keep the power bank in an inner pocket rather than exposing both devices to the cold
    • Anker’s PowerCore range is reliable and available in sizes from 5,000mAh to 26,800mAh
    • Look for power banks rated for low-temperature operation if you spend serious time below -10°C

    6. Warm Batteries Before Use, Not During

    If your batteries or devices have been exposed to cold — left in a pack outside overnight or stored in a car during a cold night — warm them up before you need them, not when you are already in trouble.

    • Bring spare batteries inside your tent in the evening before an early alpine start
    • Let a cold phone warm up gradually inside your jacket before expecting it to perform
    • Never force charge a lithium-ion battery that is below freezing — this causes permanent internal damage and reduces long-term capacity

    7. Choose Gear Designed for Cold Weather

    Some headlamps and GPS devices allow the battery pack to be worn inside your clothing, connected by a short wire to the device worn outside. This keeps the battery at body temperature regardless of external conditions and is the most reliable solution for extreme cold.

    • Petzl cold-weather headlamps with external battery packs keep cells inside your jacket while the light sits on your head
    • Some GPS units accept lithium AA batteries as an alternative to their internal rechargeable cell
    • Garmin inReach satellite communicators have external battery cable accessories for extreme cold use

    Cold Weather Battery Tips by Device Type

    Smartphones

    • Keep in an inner chest pocket at all times in temperatures below -5°C
    • Use low-power mode to reduce drain when operating in cold conditions
    • Turn screen brightness down — it reduces both power draw and heat generation
    • If the phone shuts down, warming it against your skin for five minutes usually restores it
    • Never charge a phone that is frozen or has just come in from extreme cold — let it reach room temperature first

    GPS Devices

    • Use lithium AA batteries rather than alkaline or NiMH in replaceable-battery GPS units during winter
    • Carry spare batteries pre-warmed in an inner pocket
    • If using a rechargeable GPS, keep it in an inner pocket when not actively navigating
    • Download offline maps before your trip — searching for a signal drains the battery faster in cold conditions

    Headlamps

    • Swap to lithium AAA batteries for any winter use below -5°C
    • Store the headlamp inside your sleeping bag at night, or at minimum inside the tent rather than in a cold pack vestibule
    • For long winter nights, choose a headlamp with an external battery cable that can be worn inside your jacket
    • Keep a spare set of batteries in your sleeping bag stuff sack as a guaranteed warm backup

    Cameras and Action Cameras

    • Carry two or three batteries and rotate them between your camera and a warm inner pocket
    • A battery grip on a DSLR or mirrorless camera adds both capacity and physical bulk that slows heat loss
    • GoPro and action cameras are especially vulnerable — keep in a pocket between shots
    • Some photographers place a heat pack inside their camera bag when shooting in extreme cold

    Satellite Communicators and PLBs

    • These are safety devices — treat their battery management as a priority above all other gear
    • Garmin inReach and SPOT devices use internal lithium-ion batteries that should be kept close to your body in cold conditions
    • PLBs (personal locator beacons) use long-life lithium batteries with better cold tolerance, but still benefit from being kept warm
    • Check the battery level and cold-temperature rating of your specific device before any winter trip

    What to Carry on a Winter Trip: A Simple Battery Kit

    A few inexpensive additions to your kit make cold-weather battery management much easier. This is a practical list, not an exhaustive one.

    • Lithium AA and AAA batteries — one full spare set for each battery-powered device you carry
    • Small zip-lock bags — for storing spare batteries with a hand warmer on very cold days
    • Hand warmers (x4 minimum) — one pair for your hands, one pair for the battery pouch overnight or in extreme cold
    • Compact power bank (10,000 to 20,000mAh) — kept in an inner pocket as a warm buffer for your phone and devices
    • Insulated phone pouch — for times when your phone must be accessible but cannot stay in a pocket

    Frequently Asked Questions

    Can cold weather permanently damage a battery?

    Cold by itself does not permanently damage most batteries — the capacity loss you experience at low temperatures is reversible once the battery warms up. The exception is charging a lithium-ion battery while it is below freezing. This causes metallic lithium to plate onto the anode, which permanently reduces capacity and can create a safety risk over time. Always let cold lithium-ion devices warm to at least 5°C before charging.

    Why does my phone die at 20% in the cold?

    The percentage shown on your phone’s battery indicator is an estimate based on normal temperature conditions. In cold weather, the chemical reactions in the battery slow down and the phone can no longer draw power at the rate it expects. The device shuts itself down as a protection measure, even though the charge is still physically present. Warming the phone — against your skin or inside a jacket — will typically restore it to near the indicated percentage.

    What is the best battery for a headlamp in winter?

    Energizer Ultimate Lithium AA or AAA batteries are the best choice for any headlamp used in temperatures below -5°C. They maintain performance down to -40°C, weigh less than alkaline, and will not fail when you need light most. For rechargeable headlamps, keep the device inside your clothing when not in active use and store it in your sleeping bag at night.

    How cold is too cold for lithium-ion batteries?

    Most consumer lithium-ion batteries begin to show meaningful performance loss below -10°C and may shut down devices around -20°C to -30°C, depending on the specific cell and device. For standard consumer electronics, the practical limit is around -20°C even with careful management. Specialist cells in devices like the Garmin inReach are rated lower, but should still be kept warm for reliable operation.

    Does storing batteries in a freezer extend their life?

    No — and this is an old myth worth correcting. Modern lithium and alkaline batteries are best stored at room temperature in a dry environment. Freezing and thawing can introduce condensation that causes corrosion, and the temperature cycling provides no benefit for modern battery chemistry. Store spare batteries in a cool, dry indoor location.


    Replace with your own affiliate tracking links before publishing. Prices and availability vary by retailer and region. Always verify battery compatibility with your specific device before use in critical outdoor situations. As an Amazon Associate, we earn from qualifying purchases.

  • Best Headlamps for Night Hiking and Camping

    A good headlamp is one of the most essential pieces of kit you can carry outdoors. It keeps your hands free on a dark trail, helps you navigate a campsite without waking everyone else, and can be a genuine safety item when a day hike runs long. The challenge is that the market ranges from $15 novelty lights to $100+ precision tools, and lumen counts alone tell you very little about real-world performance.

    This guide covers seven of the best headlamps for night hiking and camping, with honest pros and cons for each. It also explains what the specs actually mean on the trail and how to match a headlamp to how you actually use it.


    Quick Answer: Best Headlamps by Category

    • Best overall: Black Diamond Spot 400 — reliable, versatile, well-built, works in all conditions (~$60)
    • Best budget pick: Petzl Tikkina — simple, lightweight, dependable for casual use (~$20)
    • Best for trail running and fast hiking: Petzl Nao RL — reactive lighting adjusts automatically, excellent beam (~$125)
    • Best for serious backpacking: Black Diamond Storm 500-R — rechargeable, waterproof, powerful (~$80)
    • Best ultralight option: Nitecore NU25 — 360-degree lighting, 85g with battery (~$40)
    • Best for camping and basecamp: BioLite HeadLamp 300 — comfortable fit, rechargeable (~$40)
    • Best premium pick: Petzl Swift RL — reactive lighting, 900 lumens, USB-C rechargeable (~$140)

    Our Top Picks

    1. Black Diamond Spot 400 — Best Overall

    Price: ~$60 | Max output: 400 lumens | Weight: 86g (with batteries) | Battery: 3x AAA or rechargeable via USB (Spot 400-R version)

    The Black Diamond Spot has been a staple recommendation for outdoor use for good reason. The 400-lumen output covers everything from close-up camp tasks to trail navigation, and the waterproof rating (IPX8) means it handles genuine rain and splashing without issue. The dimming modes, red night-vision light, and lock mode to prevent accidental activation round out a thoughtfully designed package. It runs on standard AAA batteries, which is a practical advantage when you cannot recharge in the field.

    Pros:

    • 400 lumens is more than enough for most hiking and camping needs
    • IPX8 waterproof rating — genuinely submersible to one metre
    • Red light mode preserves night vision at camp
    • Lock mode prevents accidental battery drain in a pack
    • Runs on standard AAA batteries — replaceable anywhere
    • Solid build quality that holds up to regular outdoor use

    Cons:

    • AAA batteries add weight compared to integrated rechargeable models
    • No reactive lighting — you adjust brightness manually
    • Beam distance (80m) is shorter than some competitors at this price
    • The USB rechargeable version (Spot 400-R) costs more

    2. Petzl Tikkina — Best Budget Pick

    Price: ~$20 | Max output: 300 lumens | Weight: 77g (with batteries) | Battery: 3x AAA

    The Tikkina is Petzl’s entry-level headlamp, and it earns its place in this list by doing exactly what a budget headlamp should: it works reliably, weighs very little, and costs almost nothing. It is not packed with features, but for casual camping, festival use, power cuts, or as a backup light, it is hard to fault. Petzl’s build quality means it holds together far better than similarly priced alternatives from lesser-known brands.

    Pros:

    • Excellent value — reliable performance at minimal cost
    • Lightweight at 77g with batteries installed
    • Simple one-button operation with no confusing mode cycling
    • Petzl’s build quality is noticeably better than generic budget alternatives
    • Good as a backup light or for children and occasional users

    Cons:

    • No red light mode
    • Not waterproof — rated IPX4 (splash resistant only)
    • 300 lumens is adequate but limited for technical trail use in the dark
    • No lock mode — can activate in a bag
    • No tilt adjustment on the beam

    3. Petzl Nao RL — Best for Trail Running and Fast Hiking

    Price: ~$125 | Max output: 1500 lumens | Weight: 100g | Battery: Integrated rechargeable, USB-C

    The Nao RL uses reactive lighting — a sensor reads ambient light conditions and the speed you are moving and adjusts beam brightness automatically. On a moonlit trail you get a softer beam; in a dark forest it ramps up without any manual adjustment. For trail runners or fast hikers who do not want to fiddle with controls mid-stride, this is a significant practical benefit. The 1500-lumen output at maximum is genuinely powerful, with a beam distance of 120m.

    Pros:

    • Reactive lighting adapts automatically — no manual mode switching while moving
    • 1500 lumens at maximum is bright enough for fast trail running in full dark
    • USB-C charging is fast and uses a widely available cable
    • Lightweight at 100g for its output level
    • Comfortable headband designed for movement and long use

    Cons:

    • Expensive compared to non-reactive alternatives
    • Integrated battery cannot be swapped out — no backup battery option
    • Reactive mode can be unpredictable in some mixed-light situations
    • Overkill for casual camping or short evening walks

    4. Black Diamond Storm 500-R — Best for Serious Backpacking

    Price: ~$80 | Max output: 500 lumens | Weight: 111g | Battery: Integrated rechargeable, USB-C (also accepts 3x AAA as backup)

    The Storm 500-R is one of the most practical headlamps available for multi-day backpacking. It has Black Diamond’s best waterproof rating (IPX8), a powerful 500-lumen beam, and the rare ability to run on either its integrated rechargeable battery or standard AAA batteries. That dual-power option is a genuine advantage on extended trips where USB charging is not always possible. It also includes a PowerTap feature — pressing the top of the headband dims the light without cycling through modes.

    Pros:

    • Runs on integrated rechargeable battery or AAA batteries — best of both worlds
    • IPX8 waterproofing handles submersion and heavy rain
    • 500 lumens with a 100m beam covers demanding trail conditions
    • PowerTap feature dims light instantly without cycling through modes
    • Red and green night-vision modes for camp use
    • Lock mode prevents accidental activation in a pack

    Cons:

    • Heavier than some competitors at 111g
    • More expensive than the standard AAA-only Spot model
    • Slightly bulkier headband than minimalist options

    5. Nitecore NU25 — Best Ultralight Option

    Price: ~$40 | Max output: 360 lumens | Weight: 85g (including battery) | Battery: Integrated rechargeable, USB-C

    The NU25 weighs 85g including its battery — one of the lightest rechargeable headlamps available at this output level. It uses a dual-beam design with both a white flood beam and a high-CRI white auxiliary light for colour-accurate tasks like map reading or first aid. For ultralight backpackers who count every gram, it offers a sensible balance of weight, output, and versatility.

    Pros:

    • Exceptionally light at 85g including battery
    • Dual-beam with high-CRI light for accurate colour rendering at camp
    • USB-C charging with a compact, easily carried profile
    • Red light mode for night-vision preservation
    • Good value at the price for the feature set

    Cons:

    • 360 lumens maximum limits use in very dark or fast-moving trail conditions
    • Integrated battery only — no AAA backup option
    • IPX6 rating is good but not as high as IPX8 alternatives
    • Battery life at maximum output is relatively short

    6. BioLite HeadLamp 300 — Best for Camping and Basecamp Use

    Price: ~$40 | Max output: 300 lumens | Weight: 85g | Battery: Integrated rechargeable, micro-USB

    BioLite designed the HeadLamp 300 primarily for comfort during long wear — and it shows. The minimalist strap design sits flush against the forehead without a bulky battery pack at the back, which makes it notably more comfortable than traditional headlamp designs for extended camp use. The side-facing red light is better positioned for camp tasks than rear-mounted alternatives. A good choice for campers who wear their headlamp for hours at a stretch.

    Pros:

    • Flush, low-profile design is significantly more comfortable for extended wear
    • Side-mounted red light is well-positioned for camp tasks
    • Moisture sensor detects sweat or rain and automatically activates red mode
    • Lightweight at 85g with no rear battery bulk
    • Simple, intuitive controls

    Cons:

    • 300 lumens is adequate for camp but limited for demanding trail navigation
    • USB-C standard charging
    • Less suited to fast hiking or trail running than purpose-built active headlamps
    • IPX7 rating — splash resistant and submersion resistant

    7. Petzl Swift RL — Best Premium Pick

    Price: ~$140 | Max output: 900 lumens | Weight: 100g | Battery: Integrated rechargeable, USB-C

    The Swift RL sits between the Nao RL and everyday headlamps in Petzl’s range. Like the Nao, it uses reactive lighting, but at a lower maximum output and price point. It is a strong all-rounder: powerful enough for demanding hiking, comfortable enough for camp use, and light enough to carry without thinking about it. The USB-C charging and 900-lumen ceiling make it a versatile choice for those who want one headlamp that handles everything.

    Pros:

    • Reactive lighting adjusts to conditions automatically
    • 900 lumens handles everything from camp reading to technical night trails
    • USB-C charging on a widely available standard
    • Lightweight at 100g for its output and features
    • Red light mode with both steady and strobe options
    • Strong build quality typical of Petzl’s mid-to-upper range

    Cons:

    • Expensive for a headlamp — hard to justify for occasional users
    • Integrated battery only — no AAA fallback on long trips
    • Reactive mode occasionally misjudges brightness needs in tricky light conditions
    • IPX4 rating — lower waterproofing than Black Diamond alternatives

    What to Look for When Choosing a Headlamp

    Lumen counts dominate headlamp marketing, but they are only one of several factors that determine how useful a headlamp actually is on the trail.

    Lumens and Beam Distance

    Lumens measure total light output. More is not always better — a very bright headlamp at close range is blinding for camp tasks, and battery life drops steeply at maximum output. A rough guide to what different outputs are actually useful for:

    • Up to 100 lumens — reading in a tent, moving around camp, close tasks
    • 100 to 300 lumens — casual trail use, walking between campsites, general camp tasks
    • 300 to 500 lumens — trail navigation in full dark, moving terrain, most night hiking needs
    • 500 lumens and above — fast hiking, trail running, technical terrain, or those who want maximum margin

    Beam distance matters alongside lumens. A focused spot beam throws light further; a wide flood beam illuminates more of your surroundings but does not reach as far. Most quality headlamps offer both, or a blended beam you can adjust.

    Battery Type: Rechargeable vs. Replaceable

    This is one of the most important practical decisions:

    • Integrated rechargeable (USB) — lighter, more convenient for trips near charging sources, environmentally better. The trade-off: if it dies in the field, you cannot swap it out.
    • Replaceable AAA or AA batteries — heavier, ongoing cost, but you can carry spares and replace them anywhere. Better for remote or multi-week trips.
    • Dual-power (both options) — the best of both worlds, at a weight and cost premium. The Black Diamond Storm 500-R is the most practical example of this.

    Waterproofing

    IPX ratings define water resistance. For outdoor use, understanding the scale matters:

    • IPX4 — splash resistant from any direction. Adequate for light rain.
    • IPX6 — resistant to powerful water jets. Handles heavy rain reliably.
    • IPX7 — submersible to 1 metre for 30 minutes.
    • IPX8 — submersible beyond 1 metre. The best rating for outdoor headlamps.

    For hiking in the UK, Scotland, or any reliably wet environment, IPX6 as a minimum and IPX8 if budget allows is the sensible approach.

    Red Light Mode

    A red light mode is worth having on any headlamp used at camp. Red light does not destroy your night vision the way white light does — after five to ten minutes in the dark, your eyes adapt and you can see far more without any light at all. Using a red lamp at camp means you retain that night vision. It is also less disruptive to other campers and to wildlife.

    Weight

    Most quality headlamps fall between 70g and 150g with batteries. The difference is noticeable on multi-day trips where you wear the lamp for hours. For ultralight backpacking, aim for under 90g. For general use, 100g to 120g is a comfortable range that allows for better battery life and output.

    Comfort and Fit

    A headlamp you wear for two or three hours on a night hike needs to sit comfortably. Look for:

    • Adjustable straps that hold the lamp firmly without pinching
    • Tilt adjustment on the lamp head so you can direct the beam without moving your head
    • Whether the battery pack sits at the front or rear — rear battery packs balance the weight better but add bulk
    • Padding or soft lining on the headband for extended wear

    Reactive Lighting

    Some headlamps — primarily Petzl’s Nao and Swift RL range — include a sensor that automatically adjusts beam brightness based on ambient light. In practice this means the lamp dims when you are near camp with ambient firelight, and brightens when you move into full dark. For users who find themselves constantly adjusting brightness manually, reactive lighting is a genuine convenience. It is not necessary for most casual users.


    Headlamps by Use Case

    Night Hiking and Trail Navigation

    You need a beam that projects far enough to read the trail ahead, waterproofing for variable weather, and enough battery life to cover your planned time out plus a safety margin. Brightness matters more here than at camp.

    Trail Running

    A trail running headlamp needs to be light, stay securely on your head at pace, and ideally adjust brightness automatically so you are not fiddling with controls mid-run. Reactive lighting is particularly useful here.

    Camping and Basecamp Use

    At camp, comfort during extended wear and a good red light mode matter more than maximum brightness. You rarely need more than 200 lumens for camp tasks.

    Ultralight and Minimalist Backpacking

    Every gram counts. Choose an integrated rechargeable headlamp with good output-to-weight ratio and charge it before each section of trail.

    Beginners and Casual Outdoor Use

    A simple, reliable headlamp without too many modes or buttons is the best starting point. Ease of use and durability matter most.


    Frequently Asked Questions

    How many lumens do I need for night hiking?

    For most night hiking on established trails, 300 to 400 lumens is sufficient. It provides enough beam distance to read the trail ahead at a comfortable walking pace and leaves room to dim down for camp use. If you hike at speed, on technical terrain, or in very dense forest, 500 lumens or above gives a useful additional margin. Maximum lumen ratings are measured in ideal conditions and drop as the battery depletes, so headlamps with higher ceilings give you more headroom throughout a trip.

    Is a rechargeable headlamp better than one that uses batteries?

    It depends on your trips. Rechargeable headlamps are lighter, more convenient for trips near power sources, and cheaper to run over time. Replaceable-battery headlamps are better for remote or multi-week trips where you cannot recharge — carrying a spare set of AAA batteries costs almost nothing and weighs very little. For most weekend and week-long trips with access to a car or hut, rechargeable is the more practical choice.

    What does IPX rating mean for headlamps?

    IPX is the Ingress Protection scale for water resistance. For headlamps, IPX4 means splash resistant, IPX6 means resistant to strong water jets, and IPX7 or IPX8 means submersible. For wet weather hiking or any use in the rain, IPX6 is the minimum worth considering. IPX8 is the highest rating commonly found on trail headlamps and handles both heavy rain and accidental drops in puddles or stream crossings.

    Why use red light at camp?

    Your eyes take around 20 to 30 minutes to fully adapt to darkness. White light immediately resets that adaptation. Red light allows you to see what you are doing without destroying your night vision, so when you switch off the lamp you can still navigate your surroundings in low light. It is also less disruptive to other campers and produces less impact on nocturnal wildlife. Most quality headlamps above $30 include a red mode.

    Can I use a headlamp for skiing or winter mountaineering?

    Yes, but cold temperatures significantly reduce battery performance — lithium batteries handle cold better than alkaline. Some headlamps allow the battery pack to be worn inside a jacket close to the body, keeping it warmer and maintaining output. For serious winter use, check whether the headlamp is rated for cold temperatures and whether the battery can be relocated. Black Diamond and Petzl both publish cold-weather performance data for their higher-end models.

    If you’re looking for an article about keeping batteries warm check here.

    How long do headlamp batteries last?

    Battery life depends heavily on output level. At maximum brightness, most headlamps last between two and six hours. At low or medium settings, the same headlamp can run for 40 to 100+ hours. For overnight hiking, running a 200 to 300-lumen medium setting rather than maximum output is a practical way to extend runtime without meaningfully reducing usefulness. Always check the battery life figures at the output level you actually plan to use, not the maximum lumen rating.

    Do I need a headlamp with a tilt function?

    A tilt-adjustable lamp head is useful in practice. It lets you direct the beam at the ground close in front of you while cooking at camp, or angle it further down the trail while hiking — without tilting your whole head. Most headlamps above $30 include this, but it is worth checking on budget models where it is sometimes omitted.


    Prices listed are approximate retail at time of writing and may vary by retailer and region. Lumen figures are manufacturer-rated maximums; real-world output and battery life will vary with conditions and usage. Recommendations are based on practical field performance and build quality. As an Amazon Associate, we earn from qualifying purchases.

  • Best Solar Chargers for Camping and Backpacking

    A reliable solar charger can be the difference between a dead GPS on day three and a safe, connected trip. But not every solar panel is built for the trail. Weight, durability, charging speed, and how well a panel performs in real cloud cover all vary significantly between models.

    This guide covers seven of the best solar chargers for backpacking across different budgets and trip types, with honest assessments of each. It also explains what the specs mean in practice and how to choose the right one for how you actually travel.


    Quick Answer: Best Solar Chargers by Category


    Our Top Picks

    1. Goal Zero Nomad 20 — Best Overall

    Price: ~$150 | Output: 20W | Weight: 454g | Ports: USB-A, 8mm DC

    Goal Zero has been making solar gear for backcountry use for over a decade, and the Nomad 20 reflects that experience. It folds down to a compact panel that clips to the outside of a pack, charges at a practical real-world rate, and holds up to the kind of use that would destroy cheaper panels. A strong choice for three to seven day trips where you need to keep a phone, GPS, and headlamp battery topped up.

    Pros:

    • Proven track record across many seasons of field use
    • Durable, weather-resistant construction with reinforced corners
    • Charges Goal Zero power banks directly via 8mm DC port at full speed
    • Folds to a slim profile that clips neatly to a pack exterior
    • Compatible with the wider Goal Zero ecosystem

    Cons:

    • Heavier than ultralight alternatives at 454g
    • No USB-C port — requires an adapter for modern devices
    • Charging speed drops noticeably under partial cloud cover
    • More expensive than budget panels with similar wattage

    2. BigBlue 28W Solar Charger — Best Budget Pick

    Price: ~$75 | Output: 28W | Weight: 390g | Ports: 3x USB-A

    The BigBlue 28W offers more wattage than many panels at twice the price, making it one of the best value options for backpackers who want direct USB charging without carrying a separate power bank. Three USB-A ports allow simultaneous charging of multiple devices. Build quality is adequate for regular use though not as robust as premium options.

    Pros:

    • High wattage for the price — 28W is competitive well above this price point
    • Dual USB-C and one USB-A ports for charging multiple devices at once
    • Folds into a compact, lightweight package
    • Amorphous solar cells maintain better output in low light than standard monocrystalline

    Cons:

    • Build quality is noticeably below premium panels — less durable long-term
    • Rated wattage assumes ideal conditions rarely found on the trail
    • No integrated storage or kickstand


    3. BioLite SolarPanel 10+ — Best for Versatility

    Price: ~$150 | Output: 10W | Weight: 312g | Ports: USB-A, integrated 3,200mAh battery

    The SolarPanel 10+ takes a different approach from straight pass-through chargers. Its built-in 3,200mAh battery stores energy when you are moving — so charging continues even when cloud cover interrupts direct sunlight. The sunlight optimisation indicator tells you exactly where to angle the panel for maximum output. The kickstand holds a stable angle on any surface.

    Pros:

    • Built-in battery means you capture energy even when moving or in patchy sun
    • Sunlight indicator removes guesswork when positioning the panel
    • Solid kickstand works well at camp
    • More consistent charging experience than pass-through-only panels

    Cons:

    • 10W output is lower than many competitors at the same price
    • Built-in battery adds weight compared to panel-only options
    • USB-A only — no USB-C
    • Integrated battery cannot be replaced when it eventually degrades

    4. Goal Zero Nomad 50 — Best for Long or Group Trips

    Price: ~$250 | Output: 50W | Weight: 1,100g | Ports: USB-A, USB-C, 8mm DC

    The Nomad 50 is not an ultralight option, but for extended backcountry trips, base camp setups, or groups sharing a power source, the higher output is worth the weight penalty. It pairs directly with Goal Zero’s Sherpa and Yeti power stations for high-speed charging and includes both USB-A and USB-C ports for direct device use.

    Pros:

    • 50W output can fully recharge a power station in a day of good sun
    • USB-C port included alongside USB-A and DC output
    • Heavy-duty build designed for repeated backcountry use
    • Useful for groups sharing a single charging source

    Cons:

    • Heavy at 1,100g — not suitable for ultralight or weight-conscious packing
    • Expensive; better value as part of a Goal Zero power station setup
    • Bulky folded profile compared to lower-wattage panels

    What to Look for When Choosing a Backpacking Solar Charger

    Solar charger specs can be misleading. Here is what actually matters for trail use.

    Wattage and Real-World Output

    Rated wattage is measured under ideal laboratory conditions — direct midday sun at perfect angle with no heat loss. Real-world output on the trail is typically 50 to 70 percent of the rated figure. Some things to keep in mind:

    • A 20W panel in good conditions typically delivers 10 to 14W in practice
    • Cloud cover, haze, shade, and panel angle all reduce output significantly
    • Higher wattage gives you more margin — a 20W panel handles variable conditions better than a 10W panel
    • For charging a phone once per day, 10 to 20W is sufficient; for multiple devices or a power station, aim for 20W or more

    Weight

    Weight matters on a multi-day trip. Most quality backpacking solar panels fall between 200g and 700g. The trade-off is real: heavier panels tend to offer higher output and better durability. Consider your trip length and how much charging you actually need before optimising for weight.

    • Under 300g — ultralight, lower output or efficiency, suits minimalist trips
    • 300g to 500g — the practical sweet spot for most backpackers
    • 500g+ — higher output, better for extended trips or group use

    Ports and Compatibility

    Check what devices you need to charge before buying:

    • USB-A — standard for older phones, headlamps, GPS units
    • USB-C PD (Power Delivery) — required for fast charging modern phones, some GPS devices, and small laptops
    • DC output — needed for Goal Zero and some other power station ecosystems
    • Multiple ports are useful but check whether the total output is split between them or maintained per port

    Panel Type and Efficiency

    Most backpacking panels use one of two technologies:

    • Monocrystalline — more efficient per surface area, better in direct sunlight, more common in quality panels
    • Amorphous (thin film) — less efficient overall but performs better in diffuse light and cloudy conditions
    • For most UK and northern European use, amorphous panels can have a practical advantage; in consistently sunny climates, monocrystalline wins

    Durability and Construction

    Trail conditions are hard on gear. Look for:

    • Reinforced corners and stress points on folding panels
    • Laminated rather than fabric-bonded panels for long-term durability
    • Water resistance — not necessarily full waterproofing, but splash resistance at minimum
    • Attachment points or loops for clipping to a pack exterior while hiking

    With or Without an Integrated Battery

    Some panels include a built-in battery (like the BioLite SolarPanel 10+); others are pass-through only. Pass-through panels are lighter and simpler, but charging pauses whenever the sun dips. A panel with an integrated battery or a separate power bank smooths out the gaps. For multi-day trips, pairing a panel with a dedicated power bank gives the most flexibility.


    Solar Chargers by Use Case

    Weekend and Short Trips (1 to 3 days)

    For short trips where you mainly need to keep a phone and GPS topped up, a lightweight 10W to 20W panel is more than enough. Weight savings matter more here than maximum output.

    • Best choice: BigBlue 28W

    Extended Backcountry Trips (4 to 10 days)

    Longer trips mean more devices, more recharging cycles, and more variable weather. A higher-output panel (20W or above) paired with a 10,000 to 20,000mAh power bank gives you reliable charging even across multiple overcast days.

    • Best choice: Goal Zero Nomad 20
    • High output option: Goal Zero Nomad 50

    Base Camp and Group Use

    When multiple people share a single panel or you need to keep larger devices such as a satellite communicator, camera battery, or small laptop charged, output becomes the priority over weight.

    • Best choice: Goal Zero Nomad 50

    Budget-Conscious Backpackers

    You do not need to spend $150 to get a functional solar charger. Cheaper panels have genuine trade-offs in durability and efficiency, but for occasional use on fair-weather trips, they work.


    Frequently Asked Questions

    Can I charge my phone directly from a solar panel without a power bank?

    Yes, but it is not ideal. Direct solar charging works only while the sun is shining, and any cloud cover interrupts the charge. Modern phones also charge more efficiently at a consistent voltage, which a power bank provides better than a panel in variable light. For most backpackers, using a panel to charge a power bank — and the power bank to charge devices — gives a more reliable experience.

    How long does it take to charge a phone with a solar panel?

    In good direct sunlight, a quality 20W panel can fully charge a typical smartphone (3,500 to 4,500mAh battery) in two to three hours. In patchy cloud or indirect light, expect that to double or more. As a practical guide: one full day of hiking with a 20W panel clipped to your pack in reasonable sun will typically deliver one to two full phone charges, depending on conditions and angle.

    What wattage do I need for backpacking?

    For charging phones and small GPS devices on a typical weekend or week-long trip, 10W to 20W is sufficient. If you carry a satellite communicator, camera, rechargeable headlamp, and phone, step up to 20W or above. For charging power stations or keeping a group supplied, 50W is more appropriate. More wattage also gives you more resilience against cloudy days.

    Do solar panels work on cloudy days?

    Yes, but output drops significantly. On a heavily overcast day, most panels produce 10 to 25 percent of their rated output. Amorphous panels handle diffuse light better than monocrystalline, but neither performs well in deep cloud. Pairing your panel with a power bank means you store energy during sunny periods and draw from it when conditions are poor.

    Should I clip the panel to my pack while hiking?

    This is a common technique and it works, but with caveats. You will rarely achieve the optimal panel angle while moving. Swaying and shade from trees or your body further reduce output. Realistically, clipping a panel to a pack while hiking will produce around 30 to 50 percent of what stationary charging in direct sun achieves. It is still worth doing for topping up a power bank throughout the day, but do not rely on it as your only charging window.

    Are expensive solar panels significantly better?

    Yes, in two ways: efficiency and durability. A $150 panel typically converts more sunlight to usable power per square centimetre than a $40 panel, and is built to survive more seasons of packing, unpacking, and exposure to the elements. That said, the gap narrows on shorter trips in good conditions. A budget panel will function for several years with careful use; a premium panel is an investment for those who spend significant time in the backcountry every year.

    What is the difference between a solar charger and a solar power station?

    A solar charger (or solar panel) is just the panel itself — it converts sunlight to electricity and passes it on to a device or battery. A solar power station combines a large battery with charging circuitry, often in a single unit. For backpacking, a solar panel paired with a compact power bank is the most weight-efficient approach. Power stations are better suited to car camping or base camps where weight is not a concern.


    Prices listed are approximate retail at time of writing and may vary by retailer and region. Wattage figures are manufacturer-rated under ideal conditions; real-world output will be lower. Recommendations are based on practical trail performance and build quality. As an Amazon Associate, we earn from qualifying purchases.

  • Best Binoculars for Wildlife Viewing

    Good binoculars make a real difference in the field. The difference between identifying a bird in distant branches and just seeing a blur often comes down to the quality of your optics. But with prices ranging from under $100 to over $2,500, it can be hard to know where to start.

    This guide covers seven solid options across different budgets and use cases, with honest pros and cons for each. It also explains what the specs actually mean in real outdoor conditions. If you already have a quality set of binoculars, check out this article on recommended spotting scopes for some extra reach!


    Quick Answer: Best Binoculars by Category


    Our Top Picks

    1. Vortex Viper HD 10×42 — Best Overall

    Price: ~$499 | Magnification: 10x | Objective lens: 42mm | Weight: 22.2 oz

    The Viper HD consistently outperforms its price bracket. HD glass and XR anti-reflection coatings deliver noticeably better color fidelity than most sub-$500 binoculars. It handles everything from woodland birding to open-country scanning and comes with Vortex’s unconditional lifetime warranty.

    Pros:

    • Excellent low-light performance for dawn and dusk viewing
    • Fully waterproof and nitrogen fog-proofed
    • Generous eye relief at 17mm — comfortable for glasses wearers
    • Lifetime unconditional warranty with no questions asked

    Cons:

    • Heavier than 8x models at 22.2 oz
    • 10x magnification amplifies hand shake when unsupported
    • Focus wheel can feel slightly stiff straight out of the box

    2. Celestron Nature DX 8×42 — Best Budget Pick

    Price: ~$80 | Magnification: 8x | Objective lens: 42mm | Weight: 24 oz

    For first-timers or occasional users who need a reliable waterproof pair without a large outlay, the Nature DX delivers a genuinely bright image at a hard-to-beat price. It includes phase-coated prisms, which is unusual at this price point.

    Pros:

    • Waterproof and nitrogen-purged to prevent internal fogging
    • Wide field of view (360 feet at 1,000 yards) — good for tracking moving birds
    • Phase-coated prisms improve contrast for the price
    • Very affordable entry point for beginners

    Cons:

    • Noticeable chromatic aberration (color fringing) at image edges
    • Focus wheel is less precise than mid-range models
    • Not as bright as premium glass in low light
    • Plastic housing lacks the feel of more expensive pairs

    3. Nikon Monarch M5 8×42 — Best for Hiking

    Price: ~$295 | Magnification: 8x | Objective lens: 42mm | Weight: 20.5 oz

    The Monarch M5 offers one of the best weight-to-performance ratios in the full-size 8×42 category. Extra-low dispersion glass handles color accuracy well, and the rubberized armor holds up to trail use without unnecessary bulk. It is one of the lightest quality 8×42s available.

    Pros:

    • Among the lightest 8×42 models available at 20.5 oz
    • ED glass reduces color fringing at high-contrast edges
    • Comfortable, grippy rubber armor performs well in wet conditions
    • Wide field of view (357 feet at 1,000 yards) for easy bird tracking

    Cons:

    • Eye relief of 15.4mm is not ideal for glasses wearers
    • Minimum focus distance of 8.2 feet limits close-up use
    • Low-light performance is good but not outstanding

    4. Swarovski EL 10×42 — Best for Long-Distance Viewing

    Price: ~$1,999 | Magnification: 10x | Objective lens: 42mm | Weight: 30.9 oz

    The EL is the benchmark that competing manufacturers test themselves against. Edge-to-edge sharpness and low-light performance are exceptional. If you spend long hours scanning open landscapes — coastlines, prairies, or mountain meadows — and want the clearest possible image, the EL justifies its premium. For casual use, it is overkill.

    Pros:

    • Extraordinary edge-to-edge image sharpness
    • Best-in-class low-light performance
    • Ergonomic design — comfortable to hold for extended sessions
    • Swarovski’s lifetime repair warranty

    Cons:

    • Very expensive — difficult to justify for occasional use
    • Heavier than some competitors in the premium segment
    • The optical improvement over mid-range glass is real but subtle to casual users

    5. Vortex Diamondback HD 8×42 — Best for Beginners

    Price: ~$200 | Magnification: 8x | Objective lens: 42mm | Weight: 22.6 oz

    The Diamondback HD is the most commonly recommended first pair for good reason. It has the widest field of view in this list at 393 feet per 1,000 yards, making it easy to locate and track birds. The Vortex VIP warranty covers accidental damage with no charge — a genuine safety net for anyone new to using optics outdoors.

    Pros:

    • Widest field of view here at 393 feet at 1,000 yards — easy to aim and track
    • Close focus of 5 feet useful for butterflies and insects
    • Vortex VIP lifetime warranty covers accidents, no fee required
    • 8x is forgiving to hand-hold steadily

    Cons:

    • Image sharpness is slightly behind the Viper HD
    • Twist-up eyecups can loosen with heavy use over time

    6. Kowa BD 8×32 — Best Compact Option

    Price: ~$380 | Magnification: 8x | Objective lens: 32mm | Weight: 16.2 oz

    For those who prioritize portability — day hikers, travelers, or anyone who tends to leave heavy gear behind — the Kowa BD 8×32 delivers full-size optical quality in a noticeably smaller and lighter package. The trade-off is reduced light gathering in poor conditions.

    Pros:

    • Very lightweight at 16.2 oz — easy to carry all day
    • Excellent build quality for its size
    • Smooth, precise focus wheel
    • Good color fidelity in daylight conditions

    Cons:

    • 32mm objective lens gathers less light than 42mm — weaker at dawn and dusk
    • Less adjustment range on the eyecups
    • More expensive than full-size 42mm models at a similar quality level

    7. Zeiss Terra ED 10×42 — Best Mid-Range Upgrade

    Price: ~$425 | Magnification: 10x | Objective lens: 42mm | Weight: 26.1 oz

    When you have outgrown the $200 to $300 tier and want a meaningful step up without paying Swarovski prices, the Terra ED is the natural choice. Zeiss’s T* coating delivers neutral, accurate color rendering. The fiberglass-reinforced housing is tough and handles wet conditions reliably.

    Pros:

    • Zeiss T* lens coating produces accurate, neutral color rendering
    • Rugged fiberglass-reinforced chassis holds up to hard outdoor use
    • Reliable waterproof performance in rain
    • A genuine and noticeable upgrade over budget glass

    Cons:

    • Narrower field of view (300 feet at 1,000 yards) compared to the Viper HD at a similar price
    • Some units have a stiff focus wheel out of the box
    • Heavier than the Nikon M5 at the same magnification

    What to Look for When Choosing Binoculars

    Magnification (the first number)

    8x is the standard recommendation for most wildlife watching. 10x brings distant subjects closer but amplifies hand shake and reduces field of view. As a general rule:

    • 8x — better for woodland, moving birds, and general all-around use
    • 10x — better for open country, long-distance scanning, and stationary subjects
    • Anything above 10x becomes very difficult to hold steady without a tripod

    Objective Lens Diameter (the second number)

    This controls how much light enters the binocular. Larger means brighter in low light, but also heavier.

    • 32mm — compact and light, fine for daytime use, weaker at dawn and dusk
    • 42mm — the best all-around choice for most users
    • 50mm — brighter in low light but heavy; rarely necessary for wildlife

    Lens Coatings

    Coatings on the glass surfaces reduce reflections and improve brightness and contrast. Look for:

    • Fully multi-coated — coatings on all air-to-glass surfaces; this is the standard to aim for
    • Phase-coated prisms — important on roof-prism designs; corrects a color fringing issue that reduces image sharpness
    • Budget binoculars often use single-coated or partially coated lenses, which produce noticeably dimmer images

    Field of View

    Measured in feet at 1,000 yards. A wider field of view makes locating and tracking birds much easier. 350 feet or wider at 1,000 yards is considered good. Higher magnification generally reduces field of view.

    Eye Relief

    Eye relief is the distance from the eyepiece at which you can see the full image. This matters most for glasses wearers:

    • 15mm minimum if you wear glasses
    • 18mm or more is more comfortable for extended use with glasses
    • Look for twist-up eyecups that lock at your preferred position

    Waterproofing and Fog-Proofing

    For regular outdoor use, both are essential. Temperature changes cause internal fogging even without rain — walking from a warm car into cold morning air is enough. Look for:

    • O-ring sealing — keeps rain and dust out
    • Nitrogen or argon purging — prevents internal fogging; listed as “fog-proof” in specs
    • These features are standard on almost everything above $100

    Weight and Build

    A pair you carry beats a pair that stays in the car. For quality 8×42 models, 20 to 24 oz is typical. Rubber armor improves grip in wet or cold conditions and protects the body from knocks.

    Minimum Focus Distance

    Often overlooked. Binoculars that can focus at 5 to 8 feet are genuinely useful for butterflies, dragonflies, and close-range identification. Many budget models cannot focus inside 10 to 13 feet, which is limiting in woodland.


    Binoculars by Use Case

    Hiking and Backpacking

    Weight is the main concern on the trail. Look for a pair under 22 oz with reliable waterproofing and a comfortable neck strap. 8x magnification works well across the varied terrain of woodland and mountains.

    • Best choice: Nikon Monarch M5 8×42
    • Ultralight alternative: Kowa BD 8×32
    • Budget option: Celestron Nature DX 8×42

    Long-Distance and Open Country Viewing

    Scanning coastlines, prairies, or open mountain meadows benefits from 10x magnification. Image quality matters more here because you are spending long periods studying distant subjects. A tripod adapter is worth considering for extended sessions.

    • Best choice: Swarovski EL 10×42
    • More affordable option: Zeiss Terra ED 10×42
    • Mid-range: Vortex Viper HD 10×42

    Beginners and Casual Wildlife Watching

    Start with 8x. It is easier to aim quickly at a moving bird, holds steadier in hand, and has a wider field of view than 10x. A wide field of view and a solid warranty matter more at this stage than marginal optical improvements.

    • Best choice: Vortex Diamondback HD 8×42
    • Budget entry: Celestron Nature DX 8×42

    Frequently Asked Questions

    Is 8x or 10x better for birdwatching?

    For most birdwatching — particularly woodland, forest edge, or open field birding — 8x is the better all-around choice. The wider field of view makes it easier to find birds in branches, and the image stays steadier when you are on the move. 10x earns its keep in open country where birds sit still at long range. If you are only buying one pair, 8×42 is the safer starting point.

    What does ED glass mean?

    ED stands for Extra-low Dispersion. Different wavelengths of light bend at slightly different angles when passing through glass, causing colored fringing — known as chromatic aberration — around high-contrast edges like a bird against a bright sky. ED glass minimizes this effect, producing cleaner, sharper color. It is a meaningful upgrade, especially in challenging lighting conditions.

    Do I need waterproof binoculars?

    Yes, if you use them outdoors regularly. Internal fogging is just as common a problem as rain — moving from a warm car into cold morning air can fog the optics from the inside. Nitrogen or argon purging prevents this. O-ring sealing handles rain and splashes. These features are standard on most pairs above $100, so there is little reason to skip them.

    What is the difference between porro prism and roof prism binoculars?

    Porro prism binoculars have the traditional offset-barrel shape, with the objective lenses set wider than the eyepieces. Roof prism designs are straight-barreled and more compact. Roof prisms dominate modern wildlife binoculars because they are slimmer and easier to waterproof. However, they require phase coatings to match porro prism contrast — an added cost that pushes budget roof-prism models below their porro equivalents optically.

    Can I use binoculars with glasses?

    Yes, but check the eye relief figure before buying. With glasses, you need at least 15mm of eye relief to see the full field of view. Most modern binoculars have twist-up or fold-down eyecups designed for glasses wearers — fold them down and your glasses bring your eye to the correct position. Eye relief of 17 to 18mm is more comfortable for extended use.

    Are expensive binoculars worth it?

    The jump from $80 to $200 to $300 is significant and worth it for anyone who uses binoculars more than occasionally. From $300 to $650, you gain real improvements in color accuracy, edge sharpness, and low-light performance — worthwhile for regular wildlife watchers. Above $1,000, the improvements are real but incremental, and only justified if optics are central to how you spend time outdoors. A casual user is better served by a $300 pair and spending the rest on a guided wildlife trip.

    Should I use a tripod?

    For extended sessions at 10x or higher, a tripod adapter reduces fatigue and improves image stability noticeably. Most full-size binoculars have a threaded port under the central hinge for a standard tripod adapter, which costs around $15 to $30. For 8x handheld use in the field, a tripod is not necessary. It is most useful for scanning open country or any scenario where you study the same area for a long period.


    Prices listed are approximate retail at time of writing and may vary by retailer and region. Recommendations are based on optical performance and real-world usability. As an Amazon Associate, we earn from qualifying purchases.